# Running Enapter Gateway Software in Oracle VirtualBox
# Prerequisites
- Oracle VirtualBox installed on your computer
- Enapter VMDK image file (e.g.,
enapter-linux-2.5.2.487509.vmdk) - At least 60GB of free disk space
- 4GB of available RAM minimum
# Setup Process
# Step 1: Create a New Virtual Machine
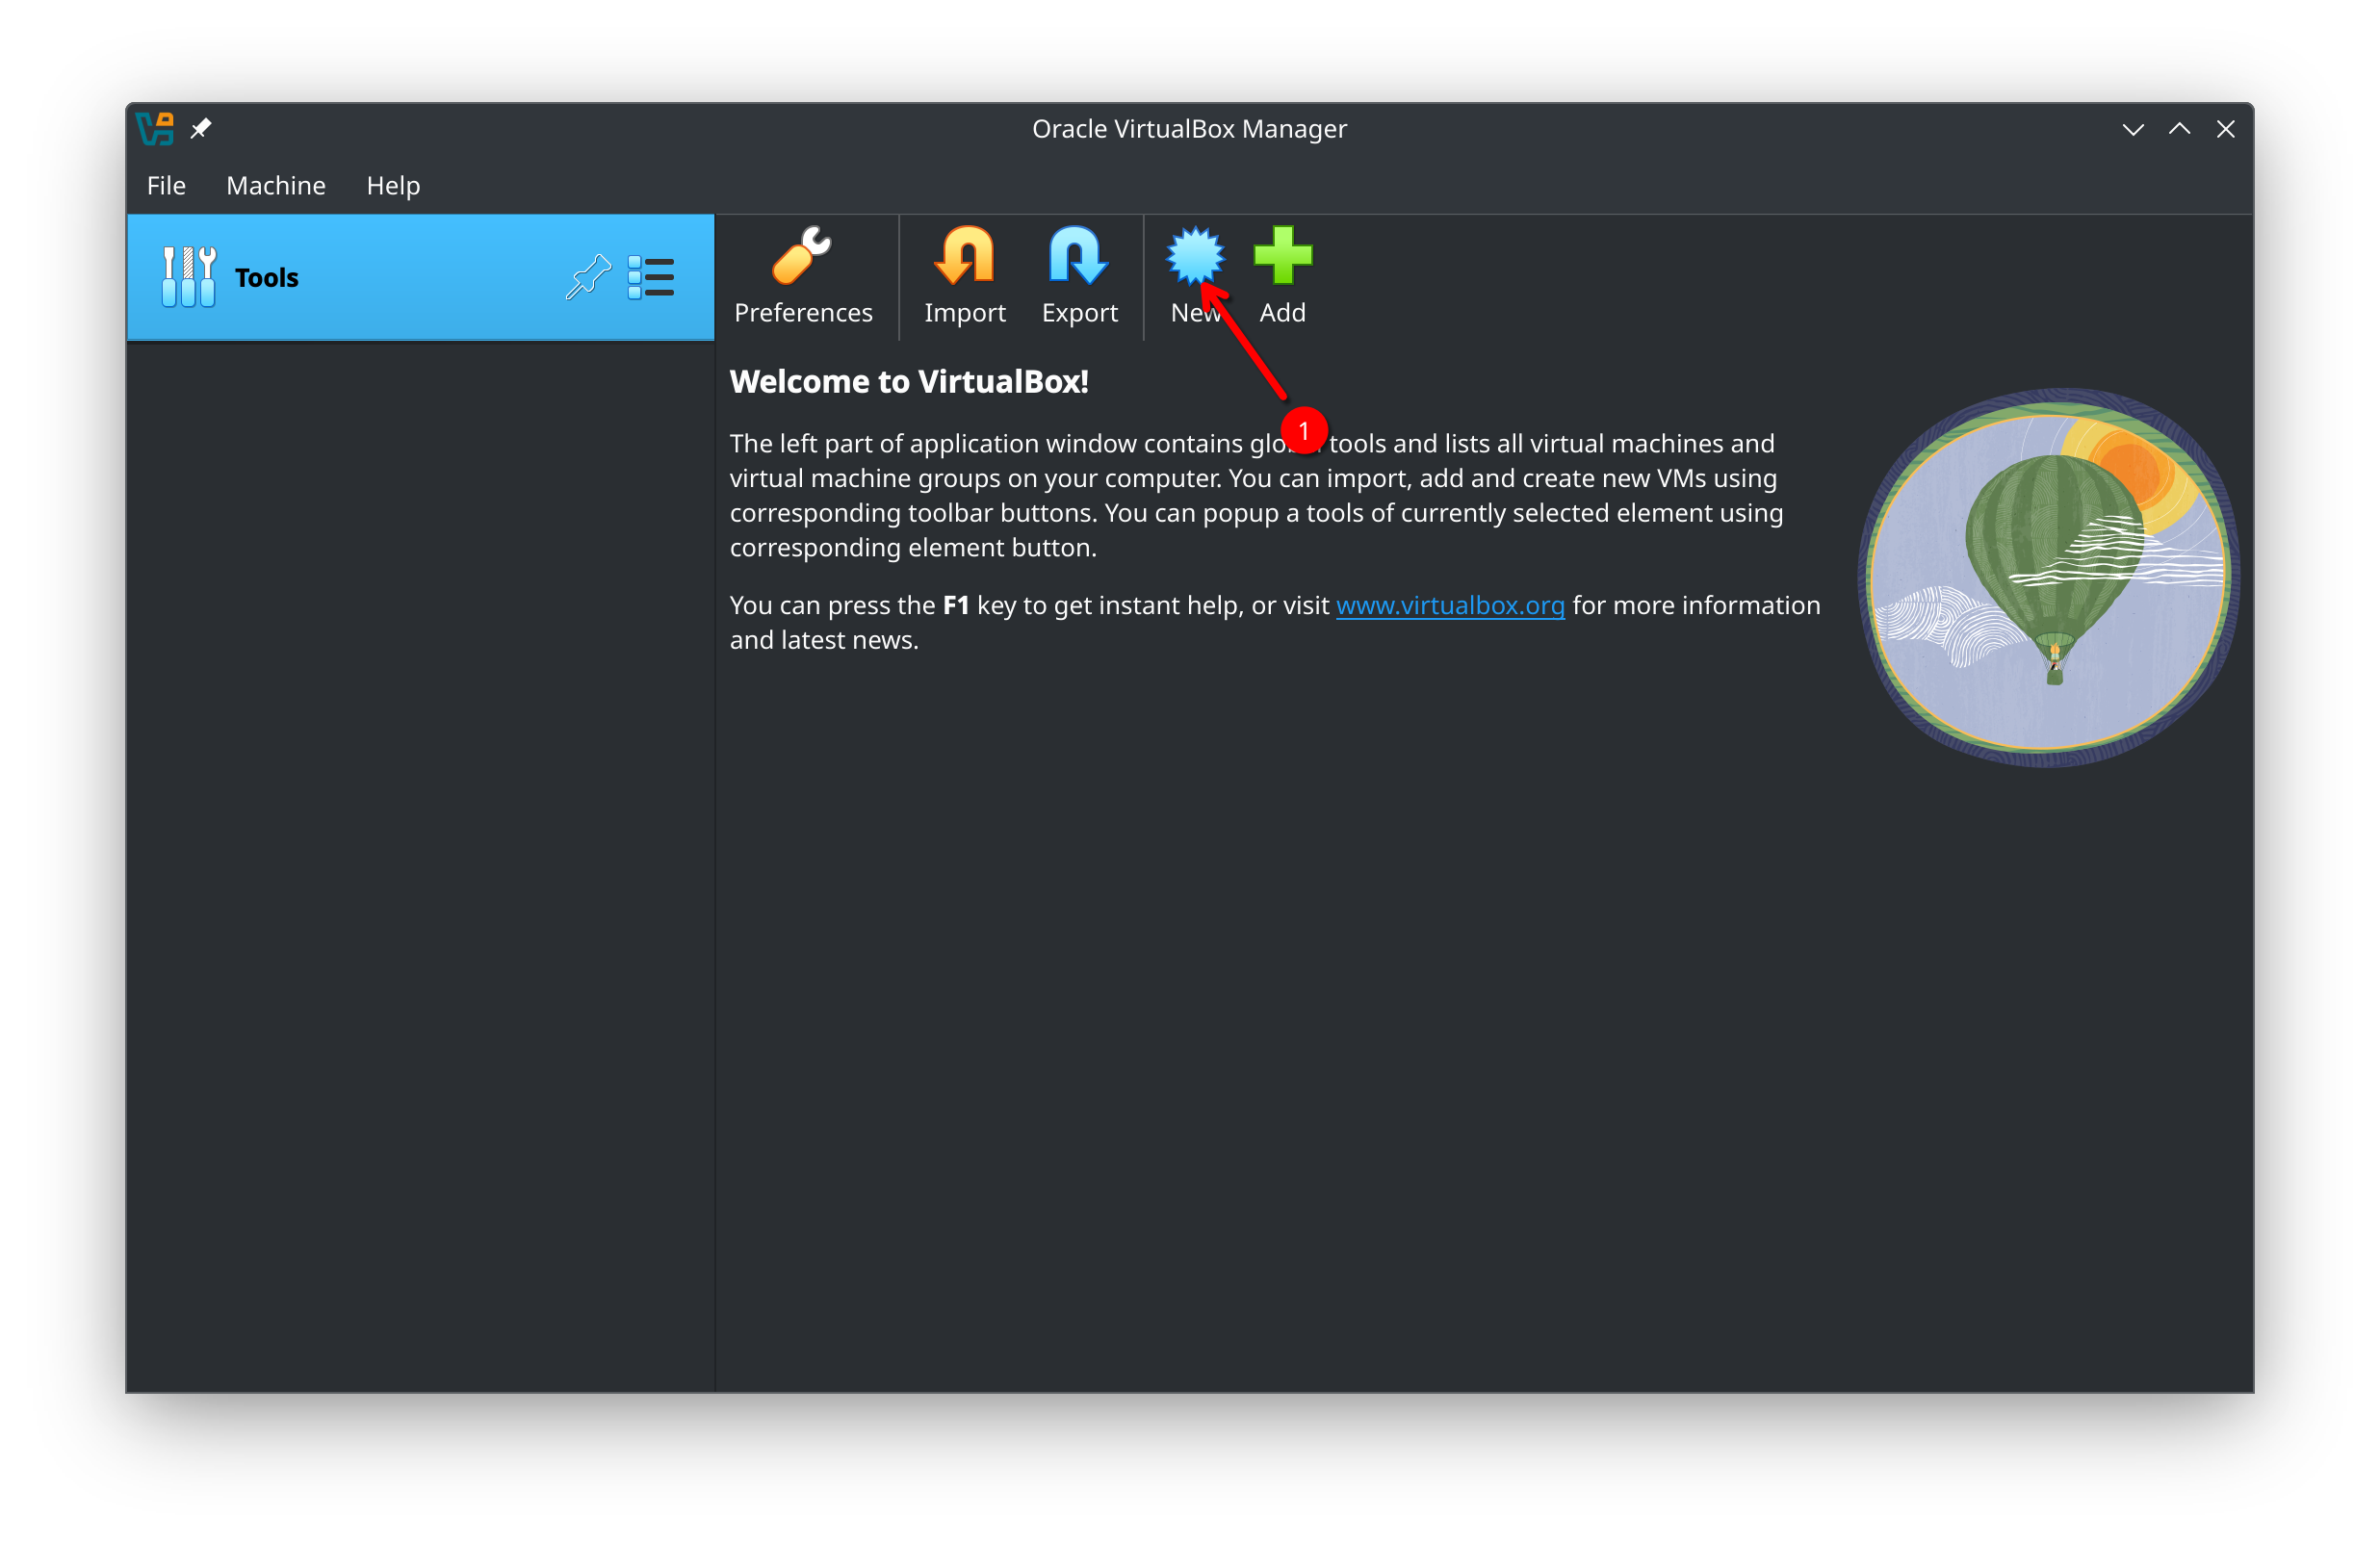
- Open Oracle VirtualBox Manager
- Click the "New" button in the toolbar
- This will start the virtual machine creation wizard
# Step 2: Configure Virtual Machine Name and Operating System
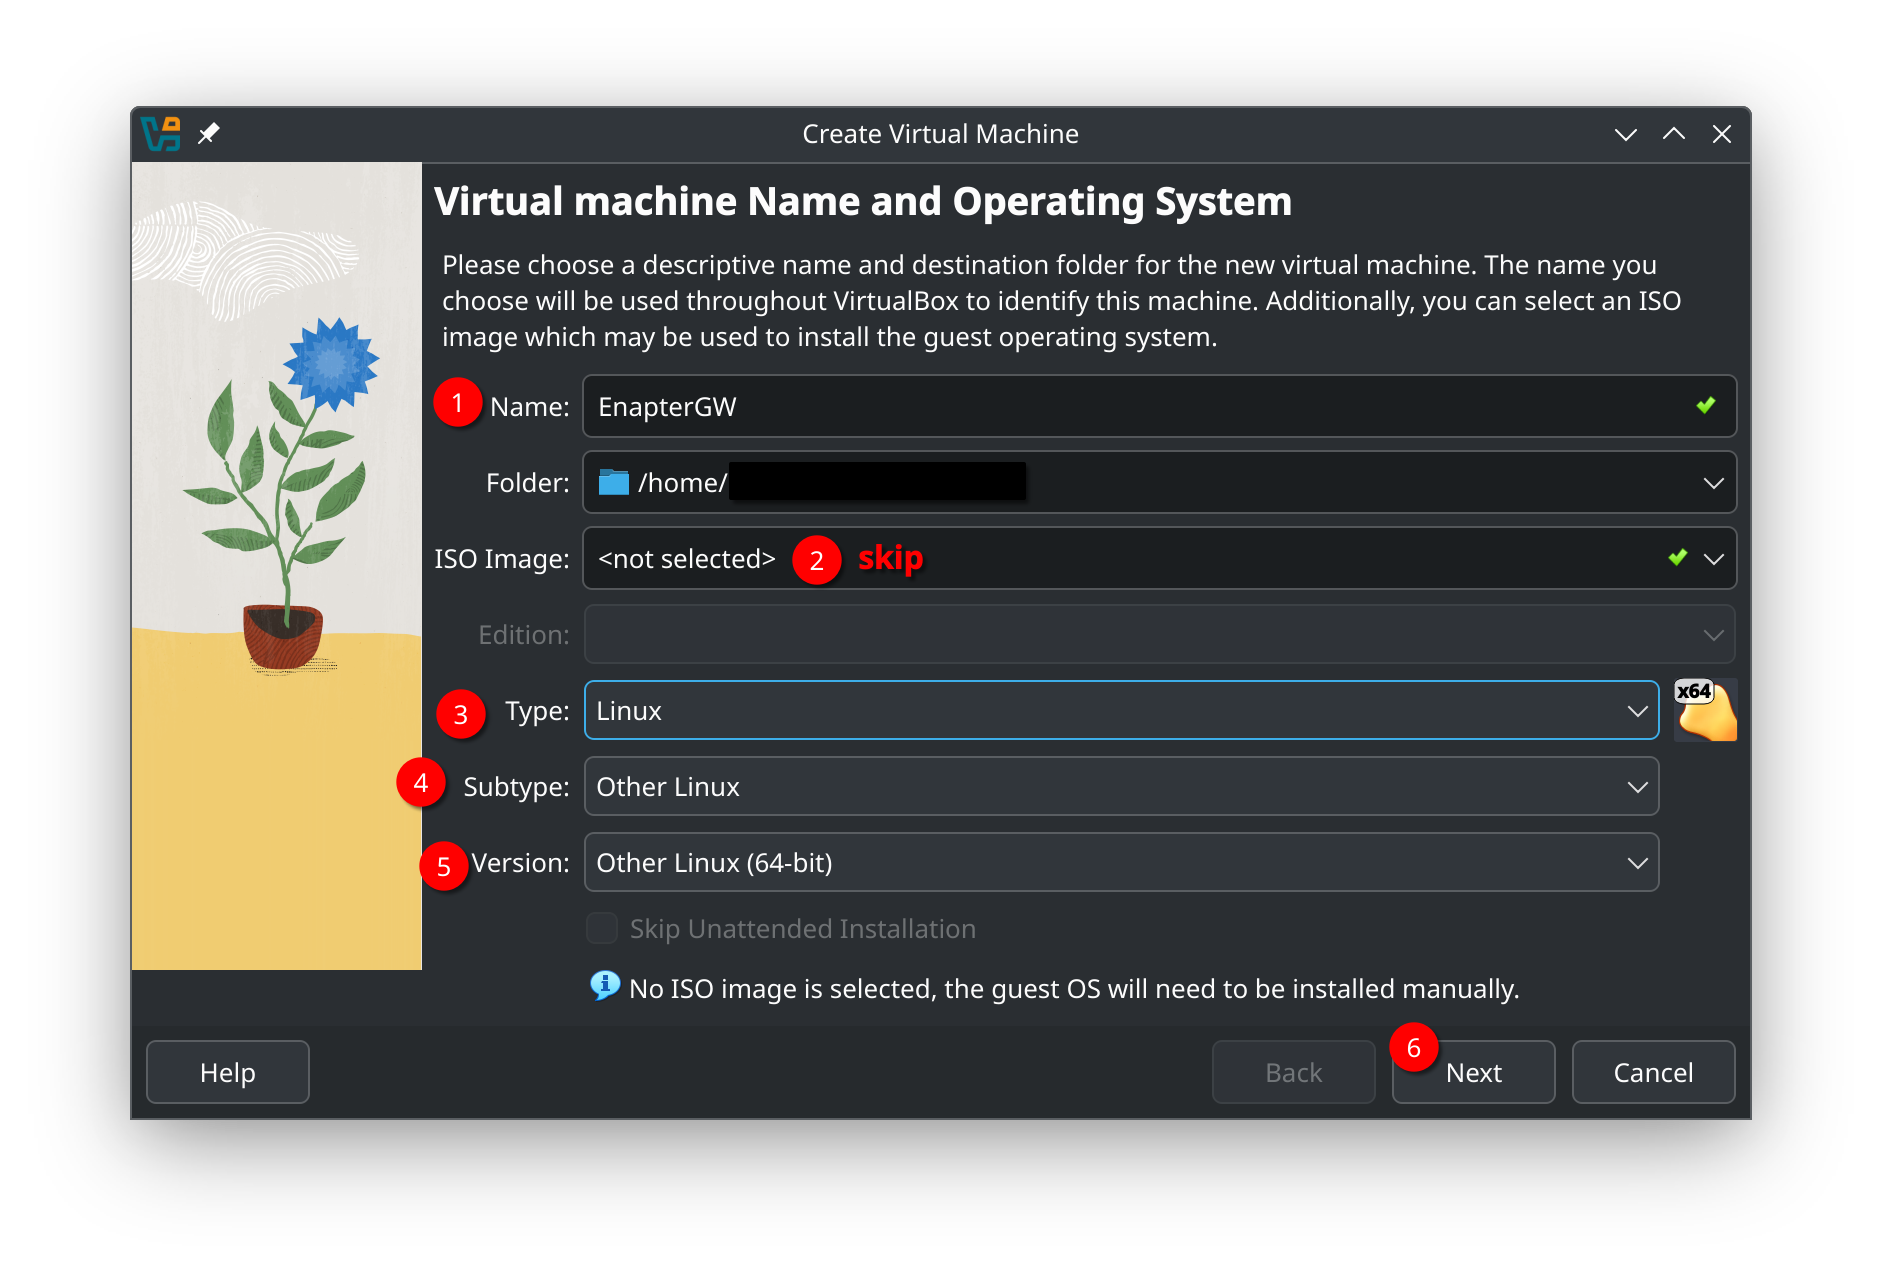
- Enter a descriptive name for your VM (e.g., "EnapterGateway")
- Set the folder path where the VM will be stored
- Important: Do NOT select an ISO image at this stage
- Configure the operating system settings:
- Type: Linux
- Subtype: Other Linux
- Version: Other Linux (64-bit)
- Click "Next"
# Step 3: Configure Hardware Resources
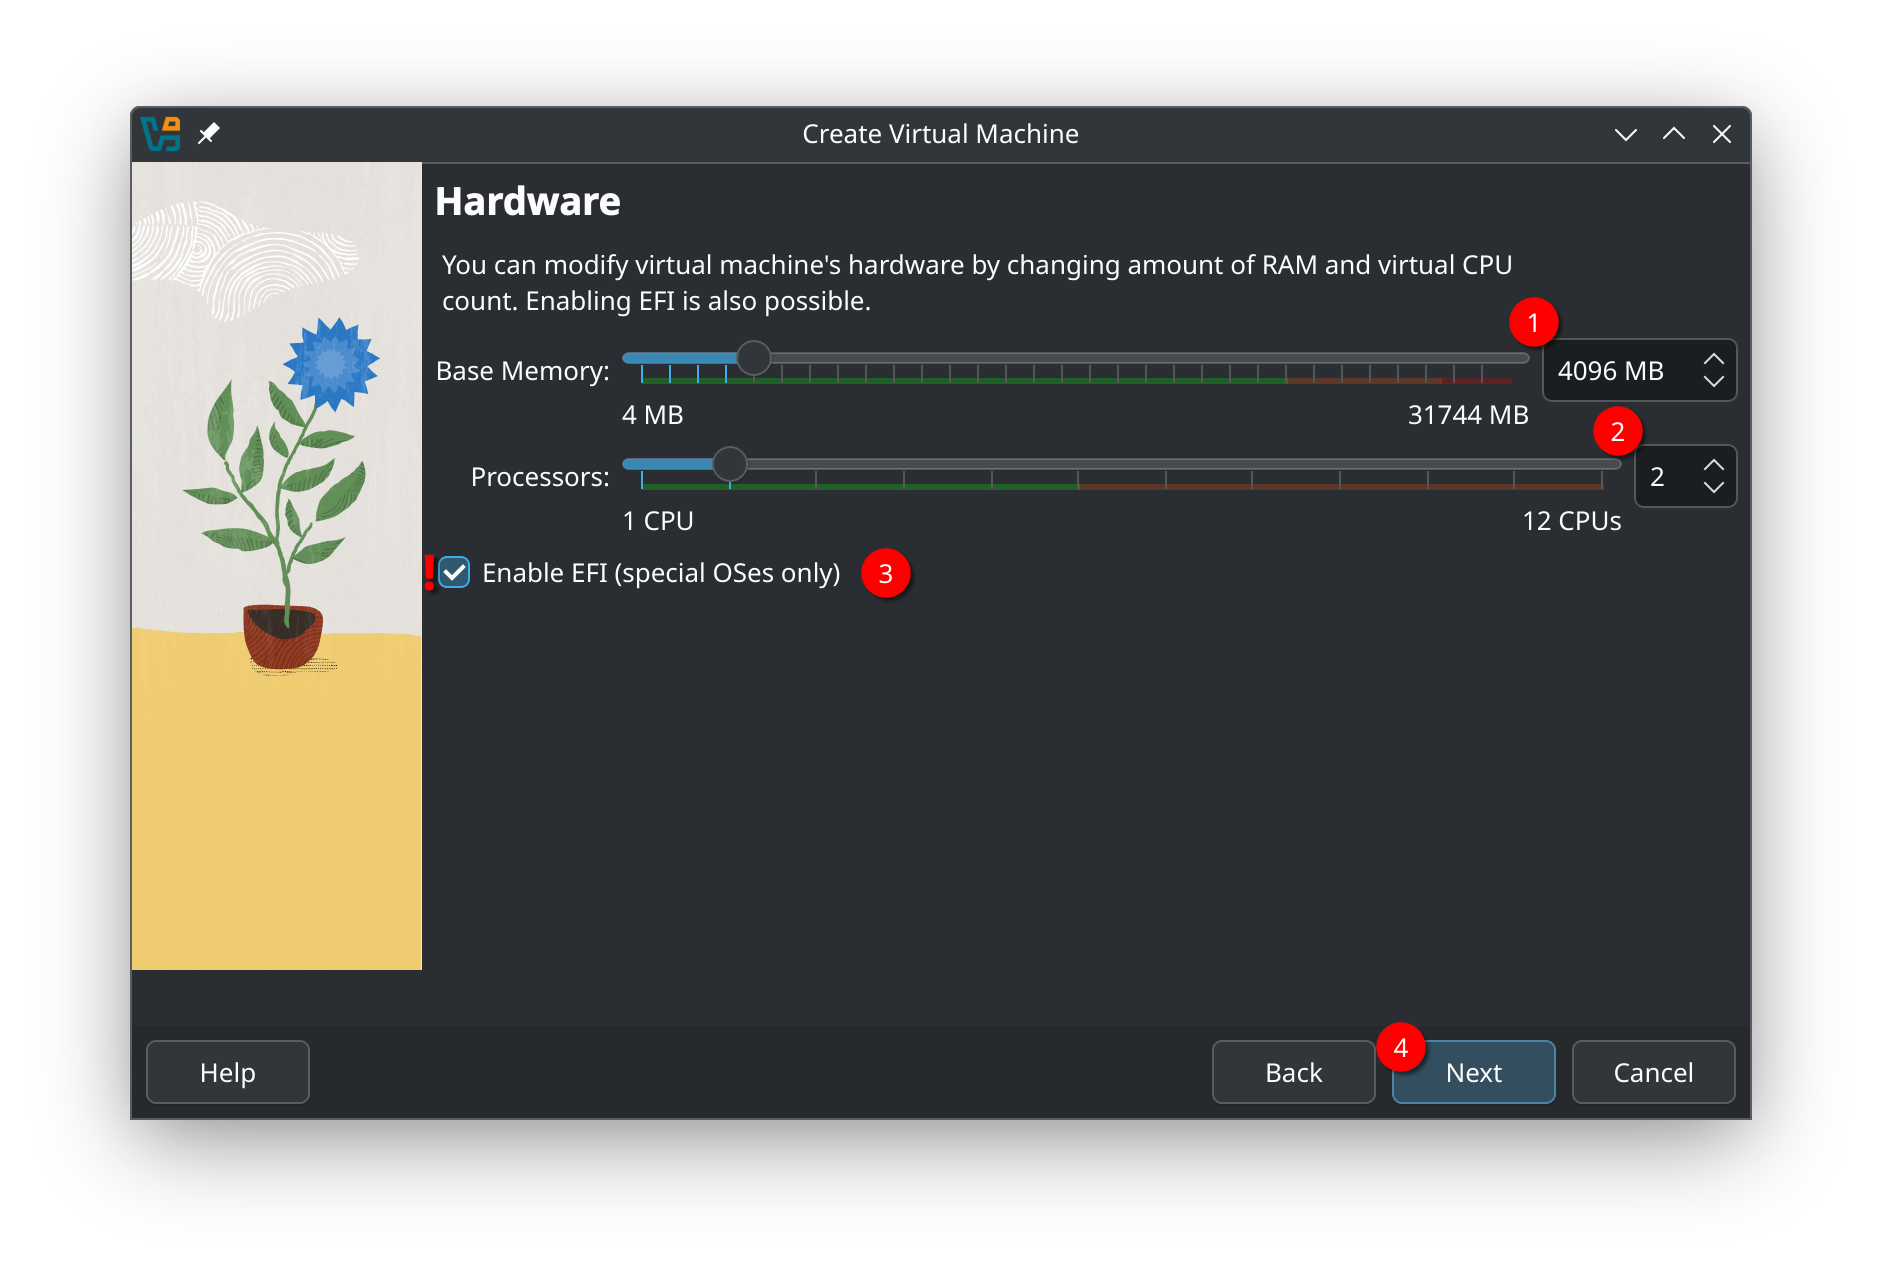
- Set the Base Memory to minimum 4096 MB (4GB)
- Set the number of processors to 2
- Critical Setting: Enable EFI (special OSes only) by checking the box
- Click "Next"
# Step 4: Configure Virtual Hard Disk
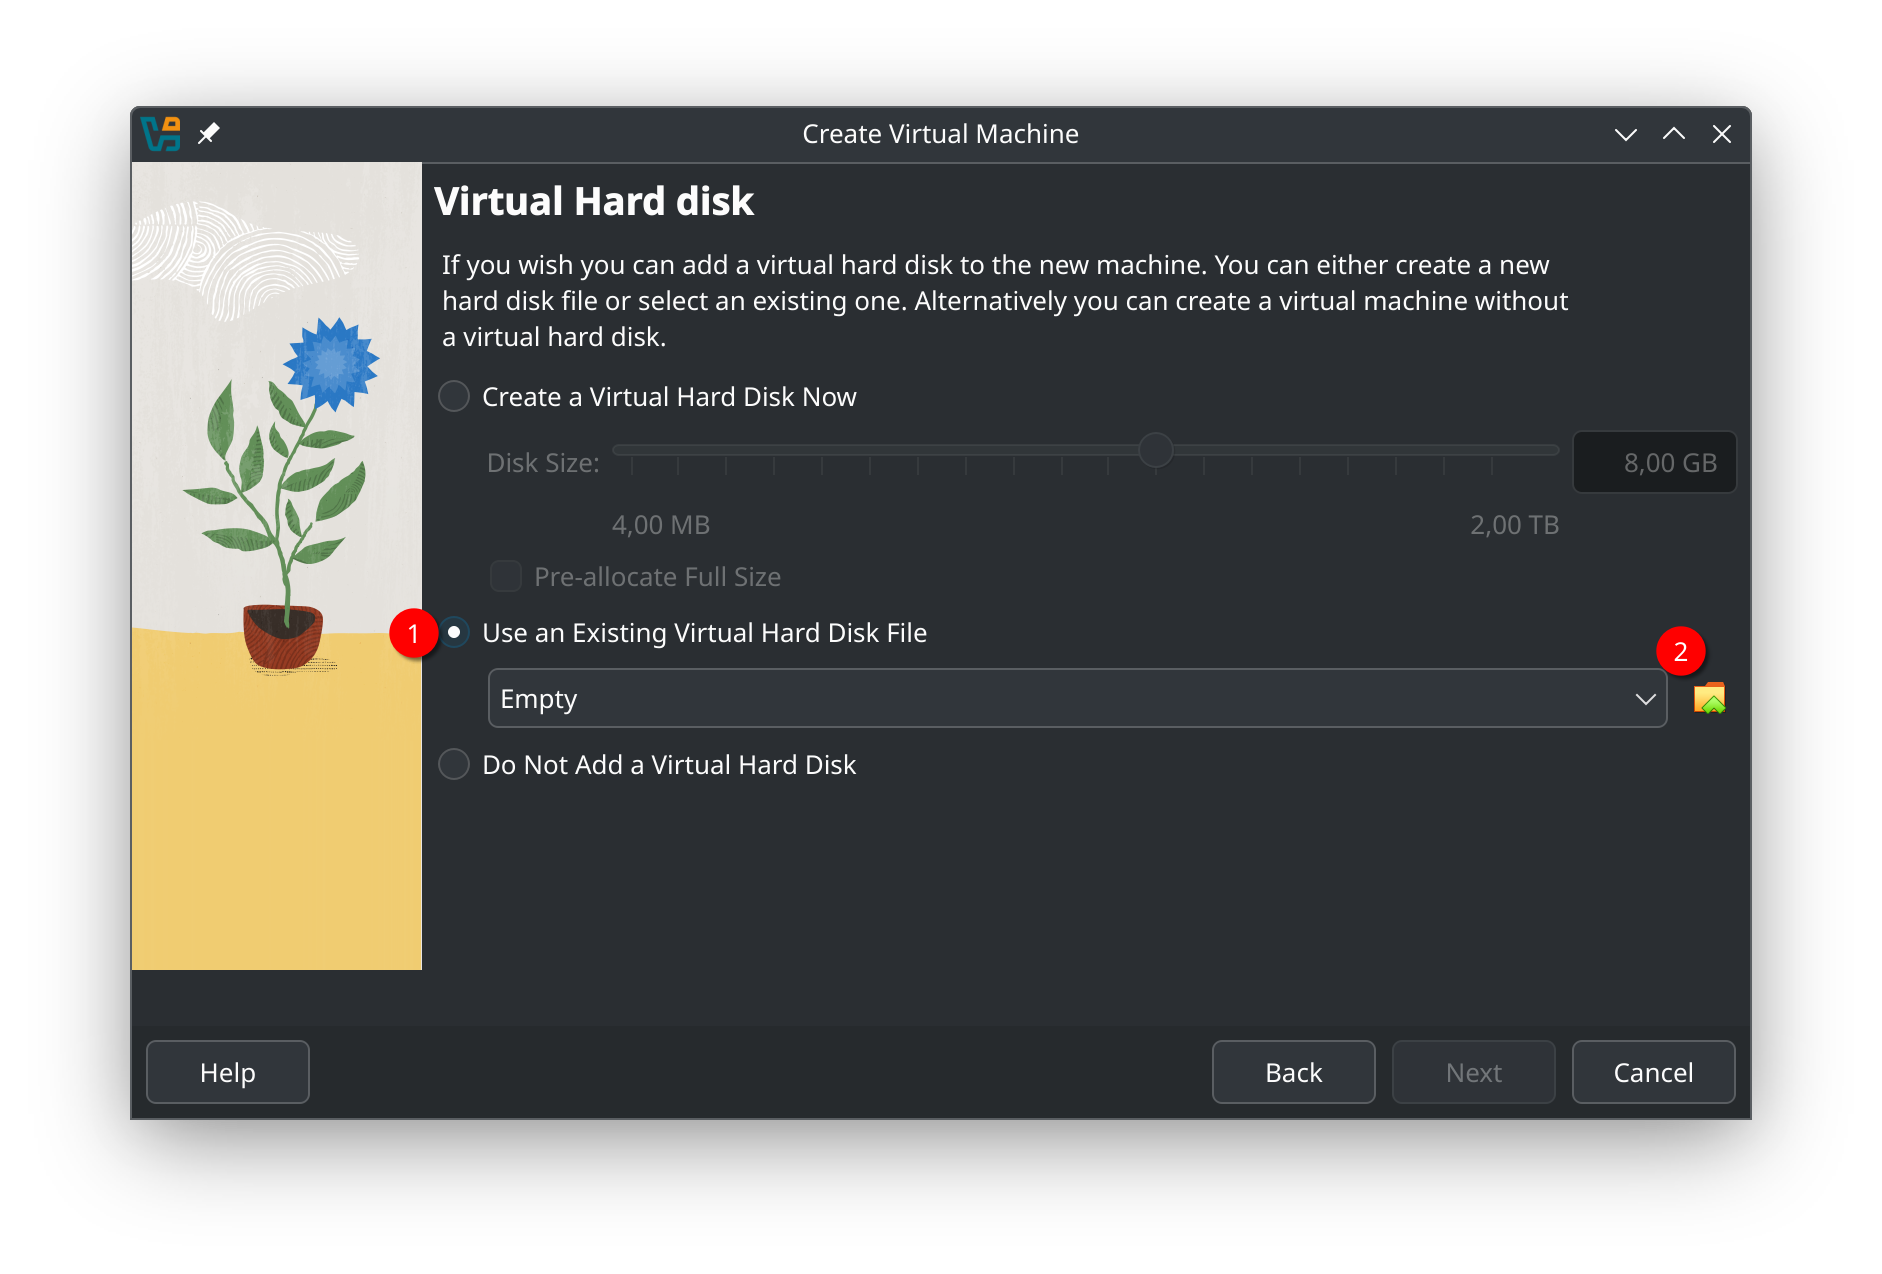
- Select "Use an Existing Virtual Hard Disk File"
- The dropdown will be empty initially, so click the folder icon to browse for your disk image
# Step 5: Select the Enapter VMDK Image
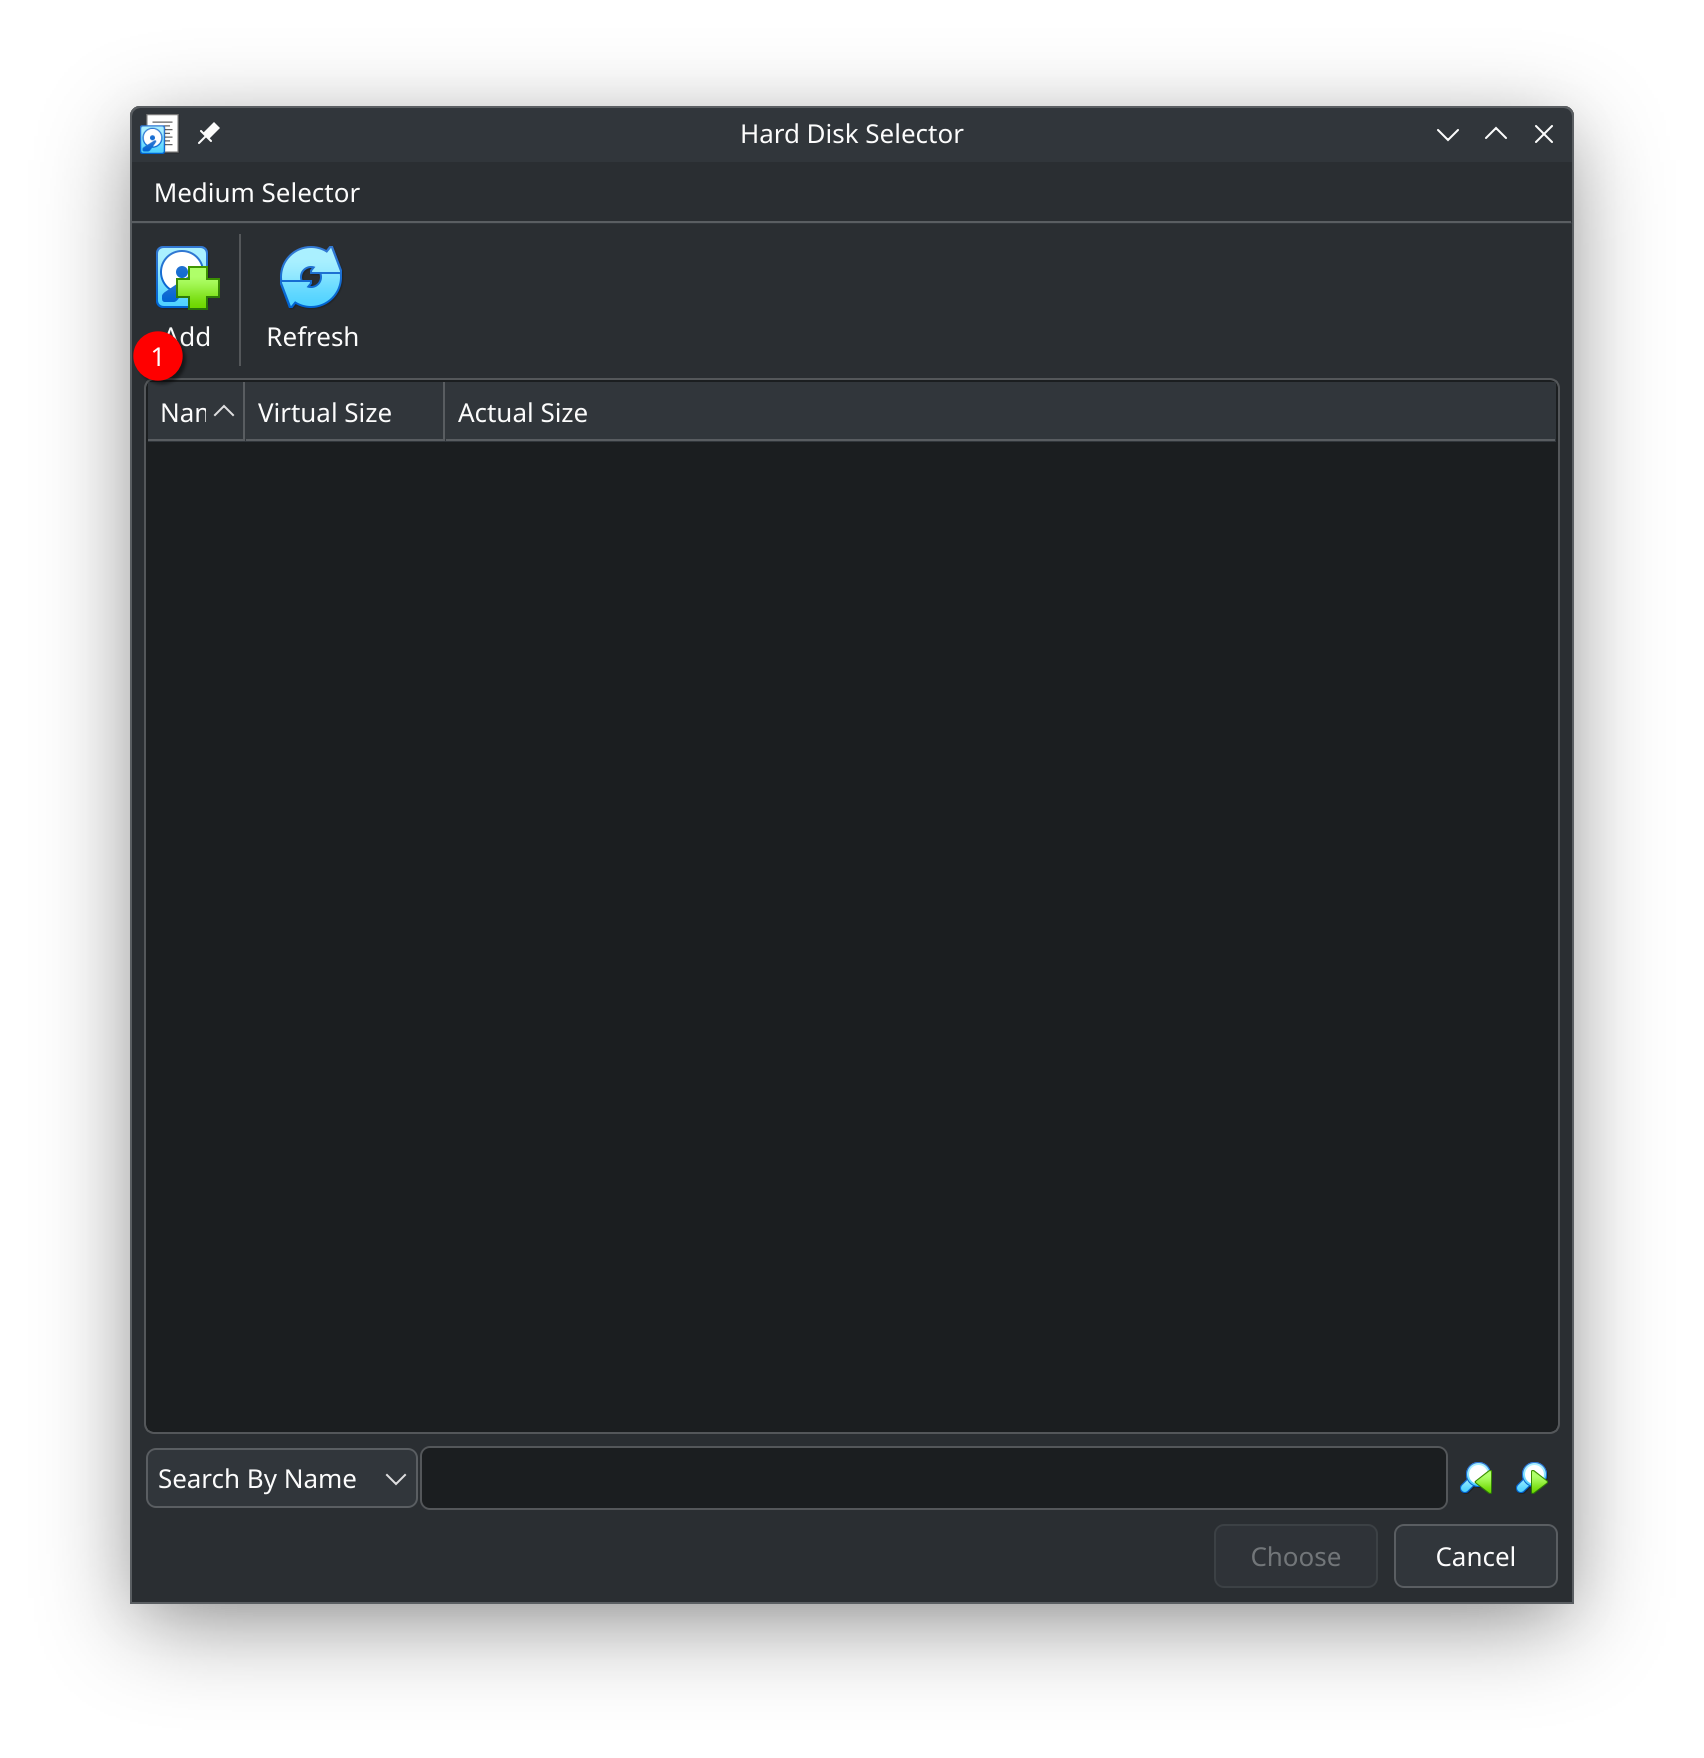
- In the Hard Disk Selector dialog, click "Add" to browse for the Enapter system disk image
# Step 6: Browse for the Enapter VMDK File
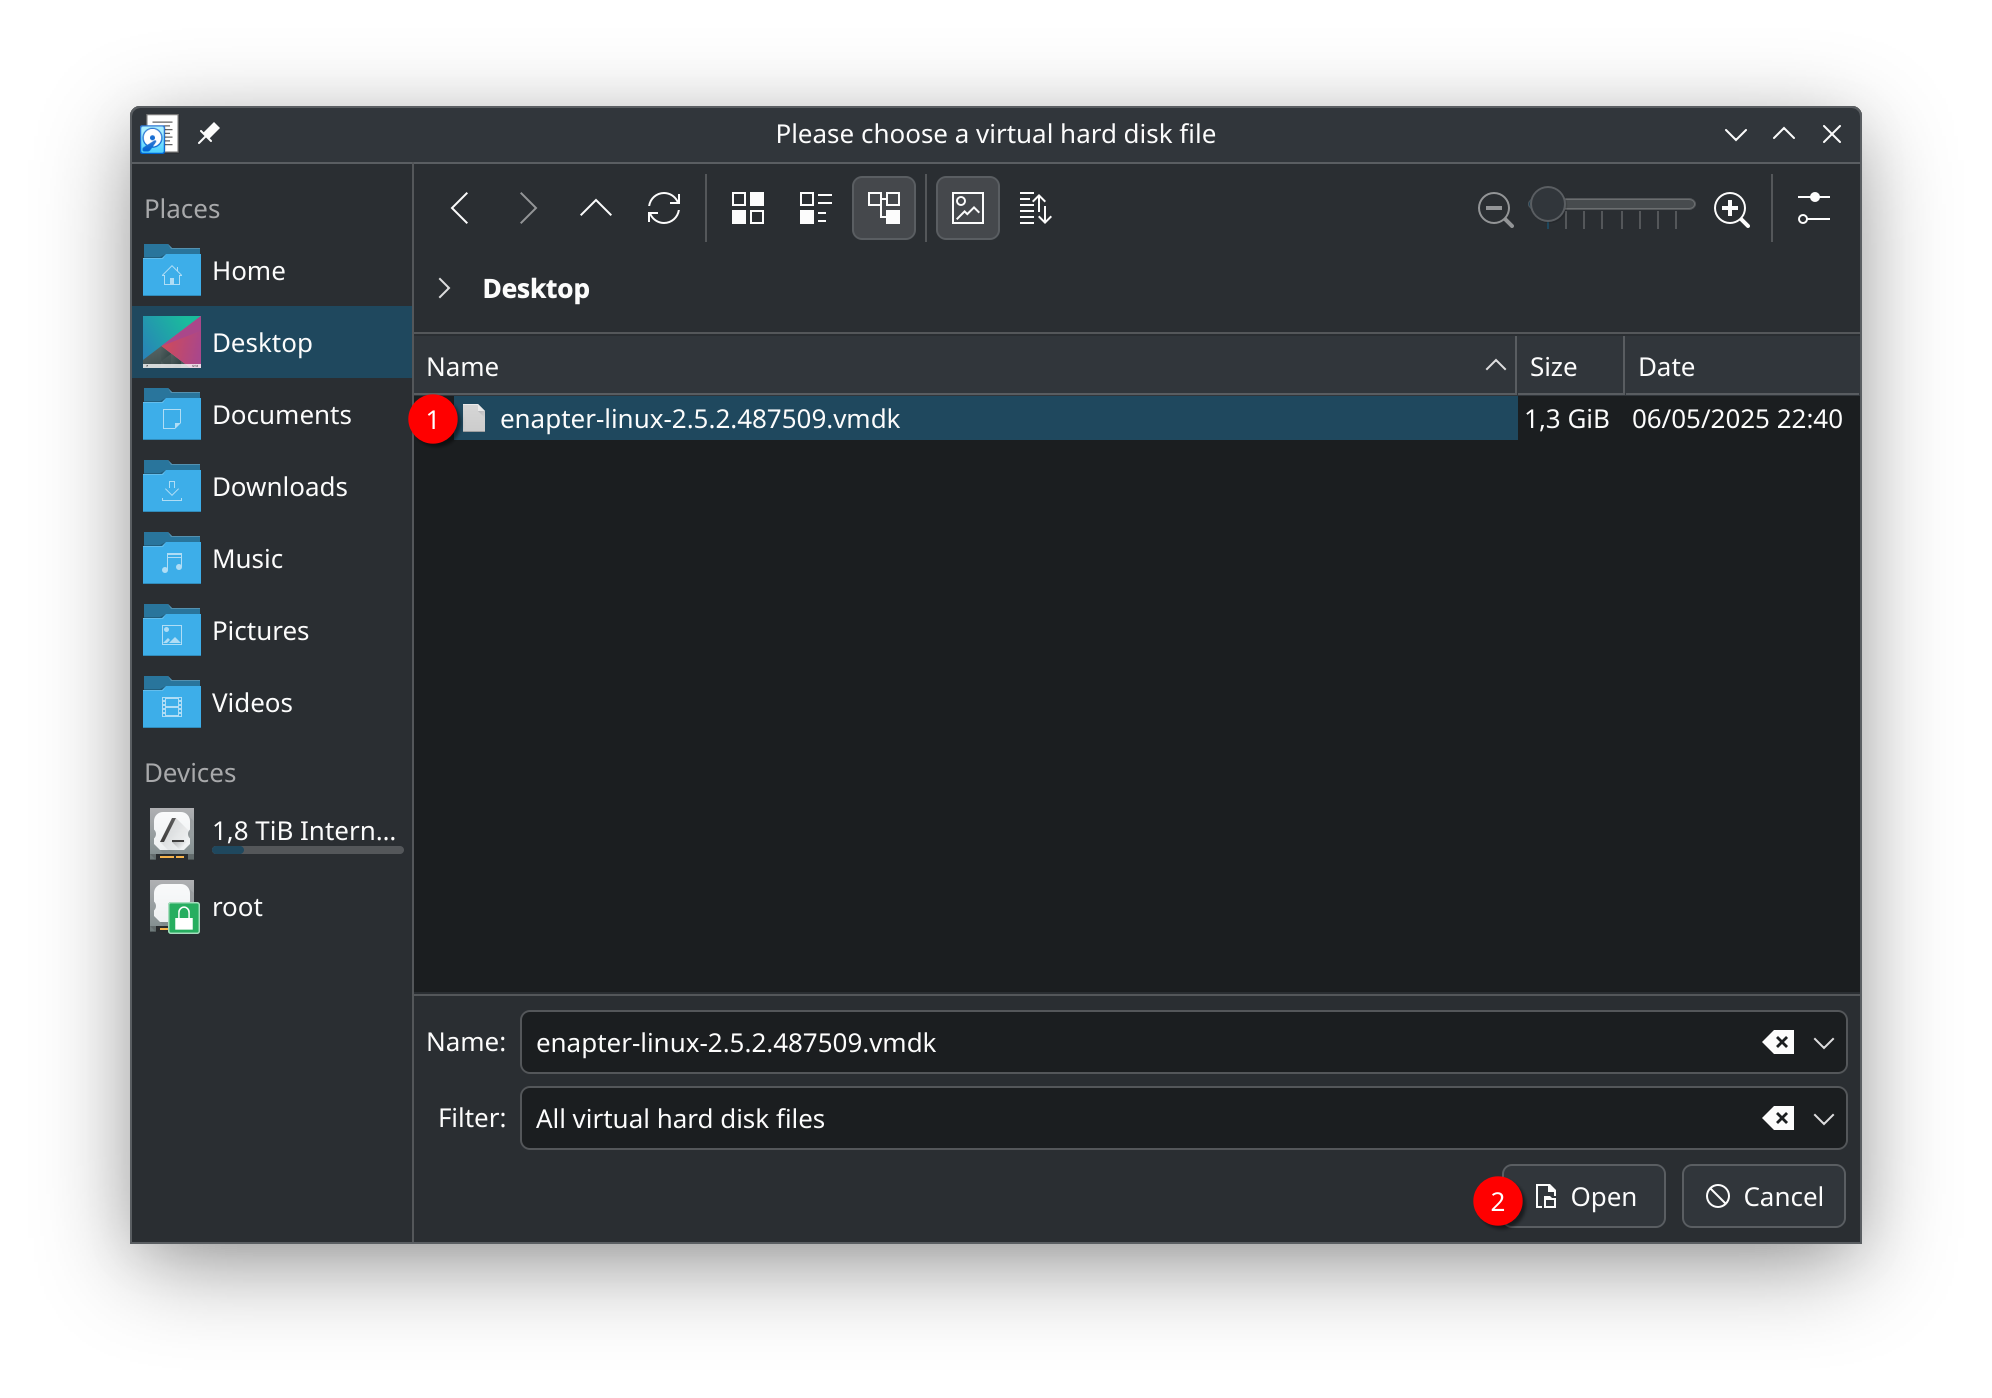
- Navigate to the location where you saved the Enapter VMDK file
- Select the file
enapter-linux-2.5.2.487509.vmdk - Click "Open"
# Step 7: Confirm the Hard Disk Selection
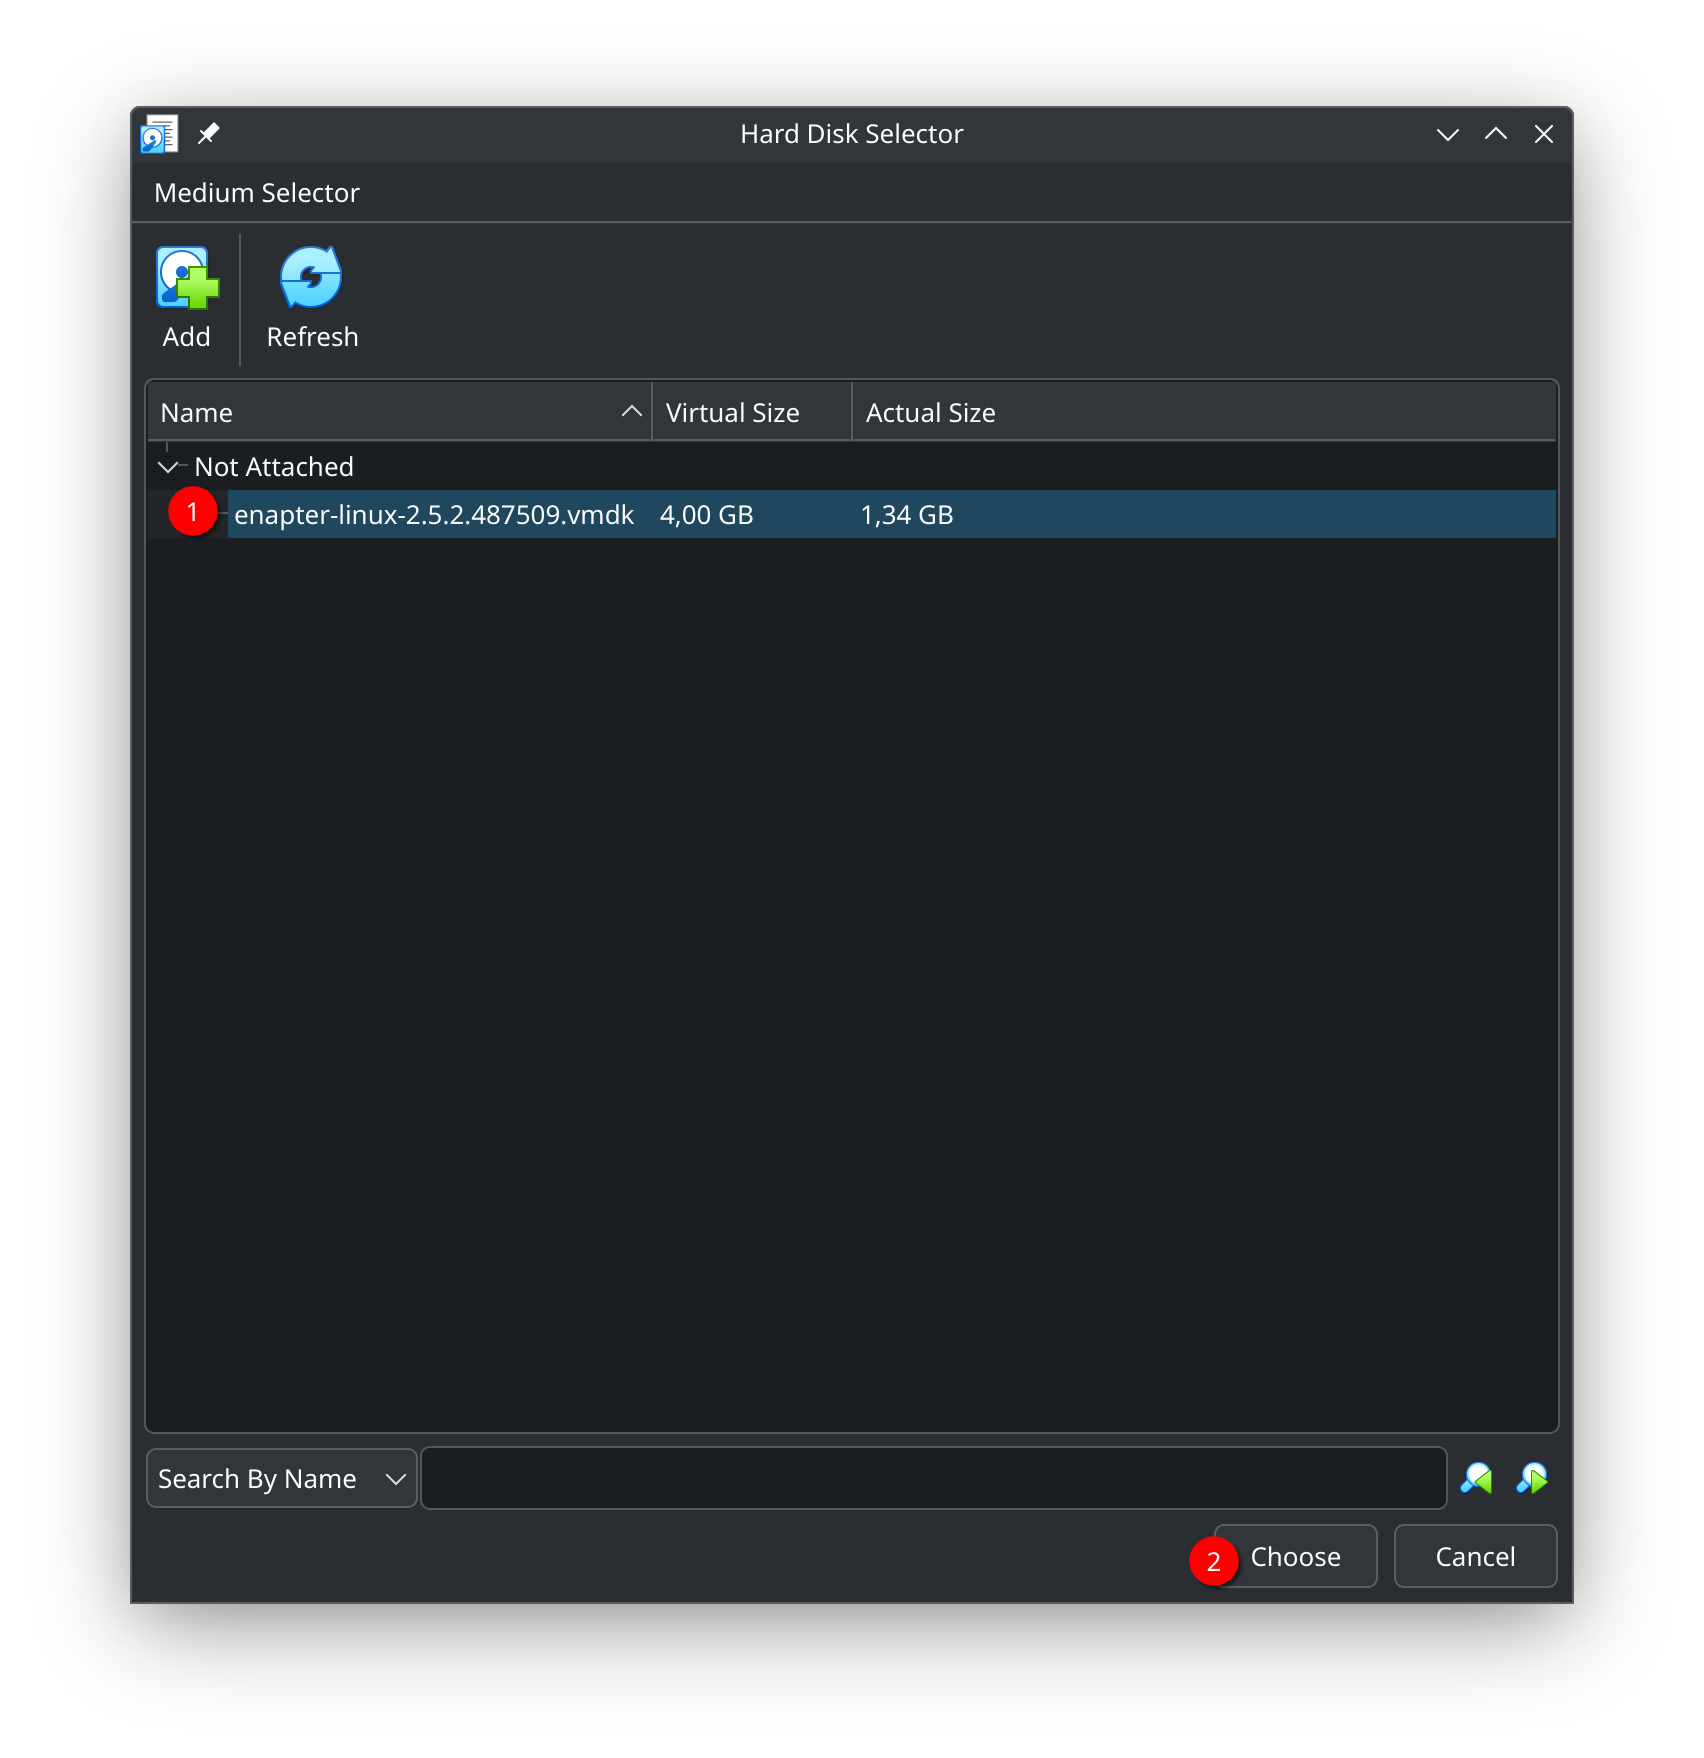
- Verify the VMDK file appears in the list showing:
- Name: enapter-linux-2.5.2.487509.vmdk
- Virtual Size: 4.00 GB
- Actual Size: 1.34 GB
- Select the disk and click "Choose"
# Step 8: Complete Initial VM Setup
- Confirm the virtual hard disk is now selected
- Click "Next" to proceed
# Step 9: VM Created - Access Settings
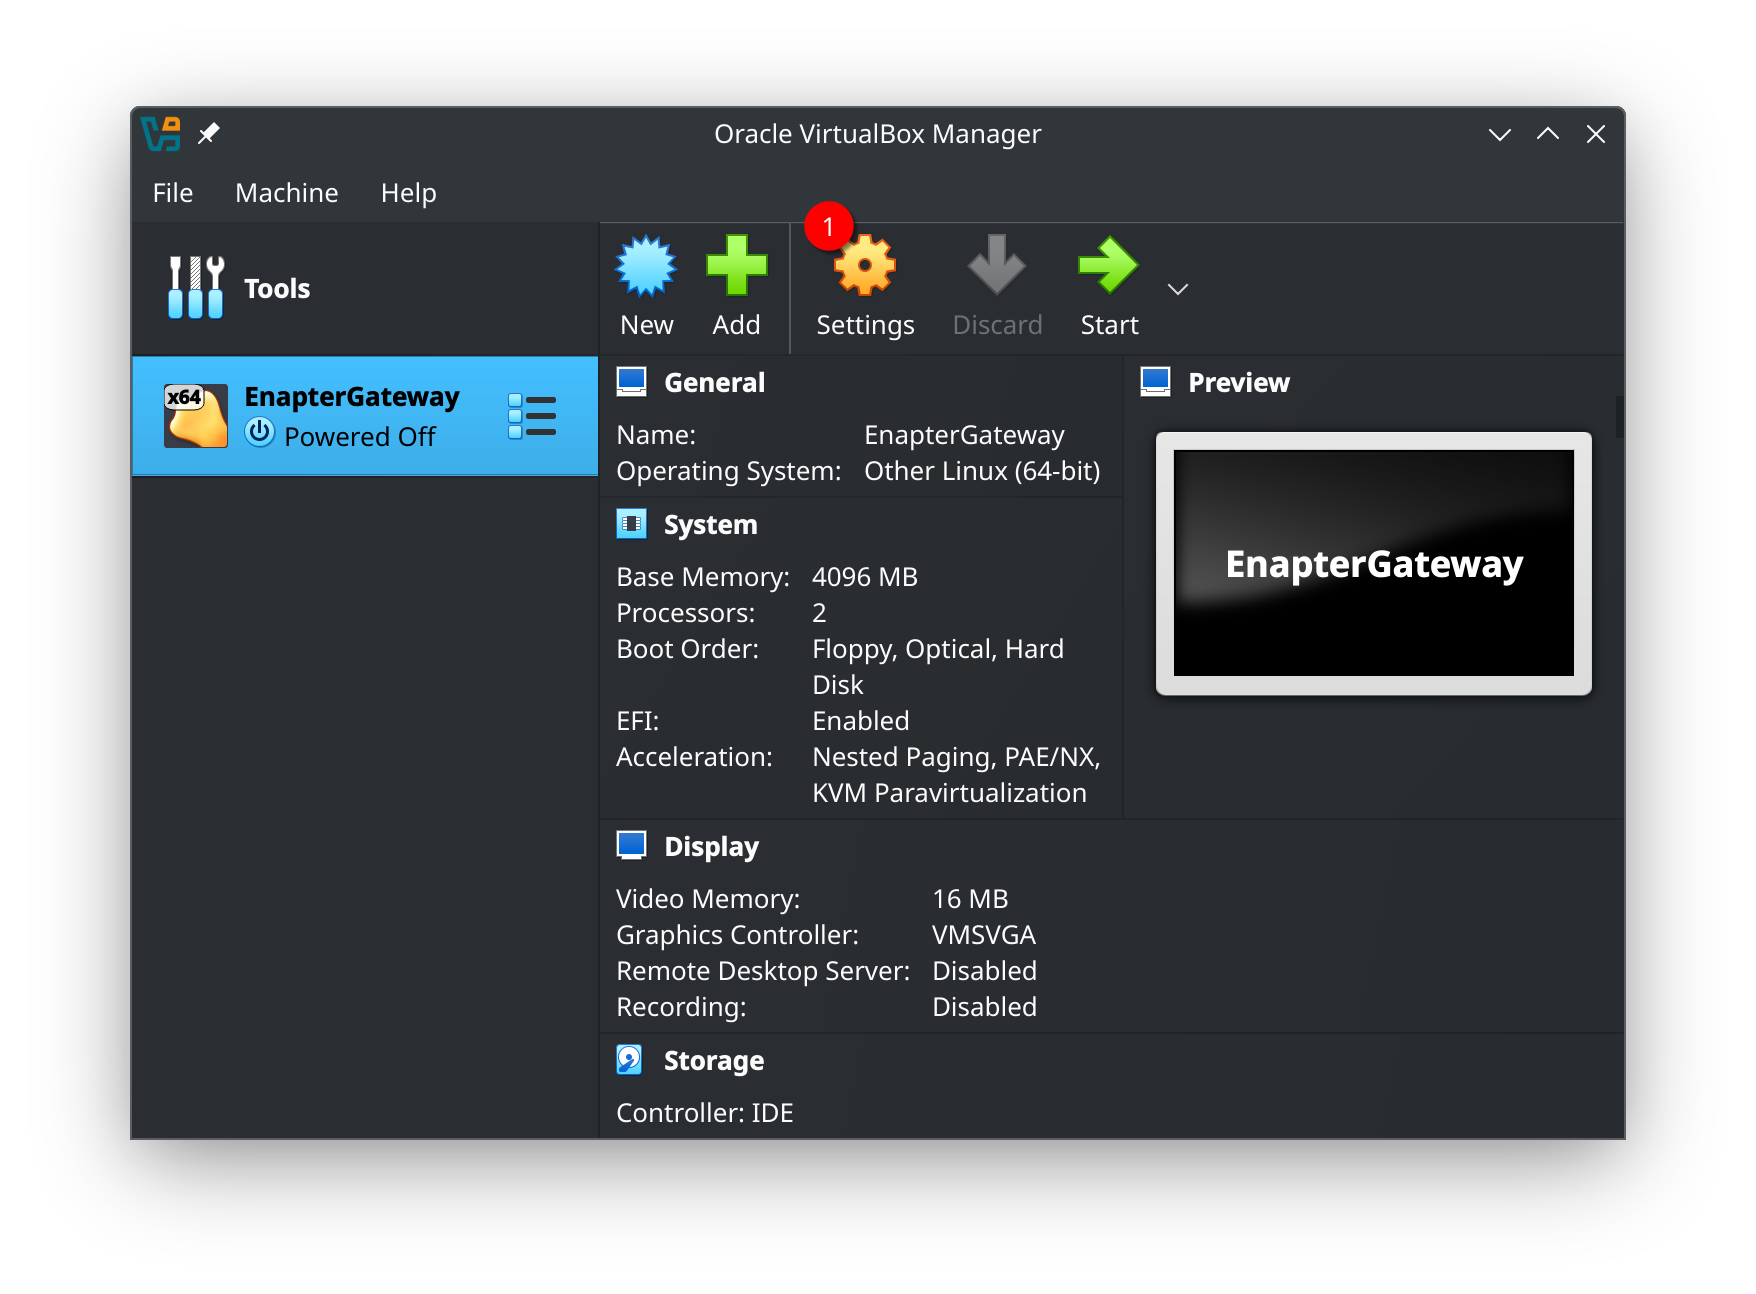
- Your VM is now created and appears in the VirtualBox Manager
- Click on "Settings" to configure additional storage
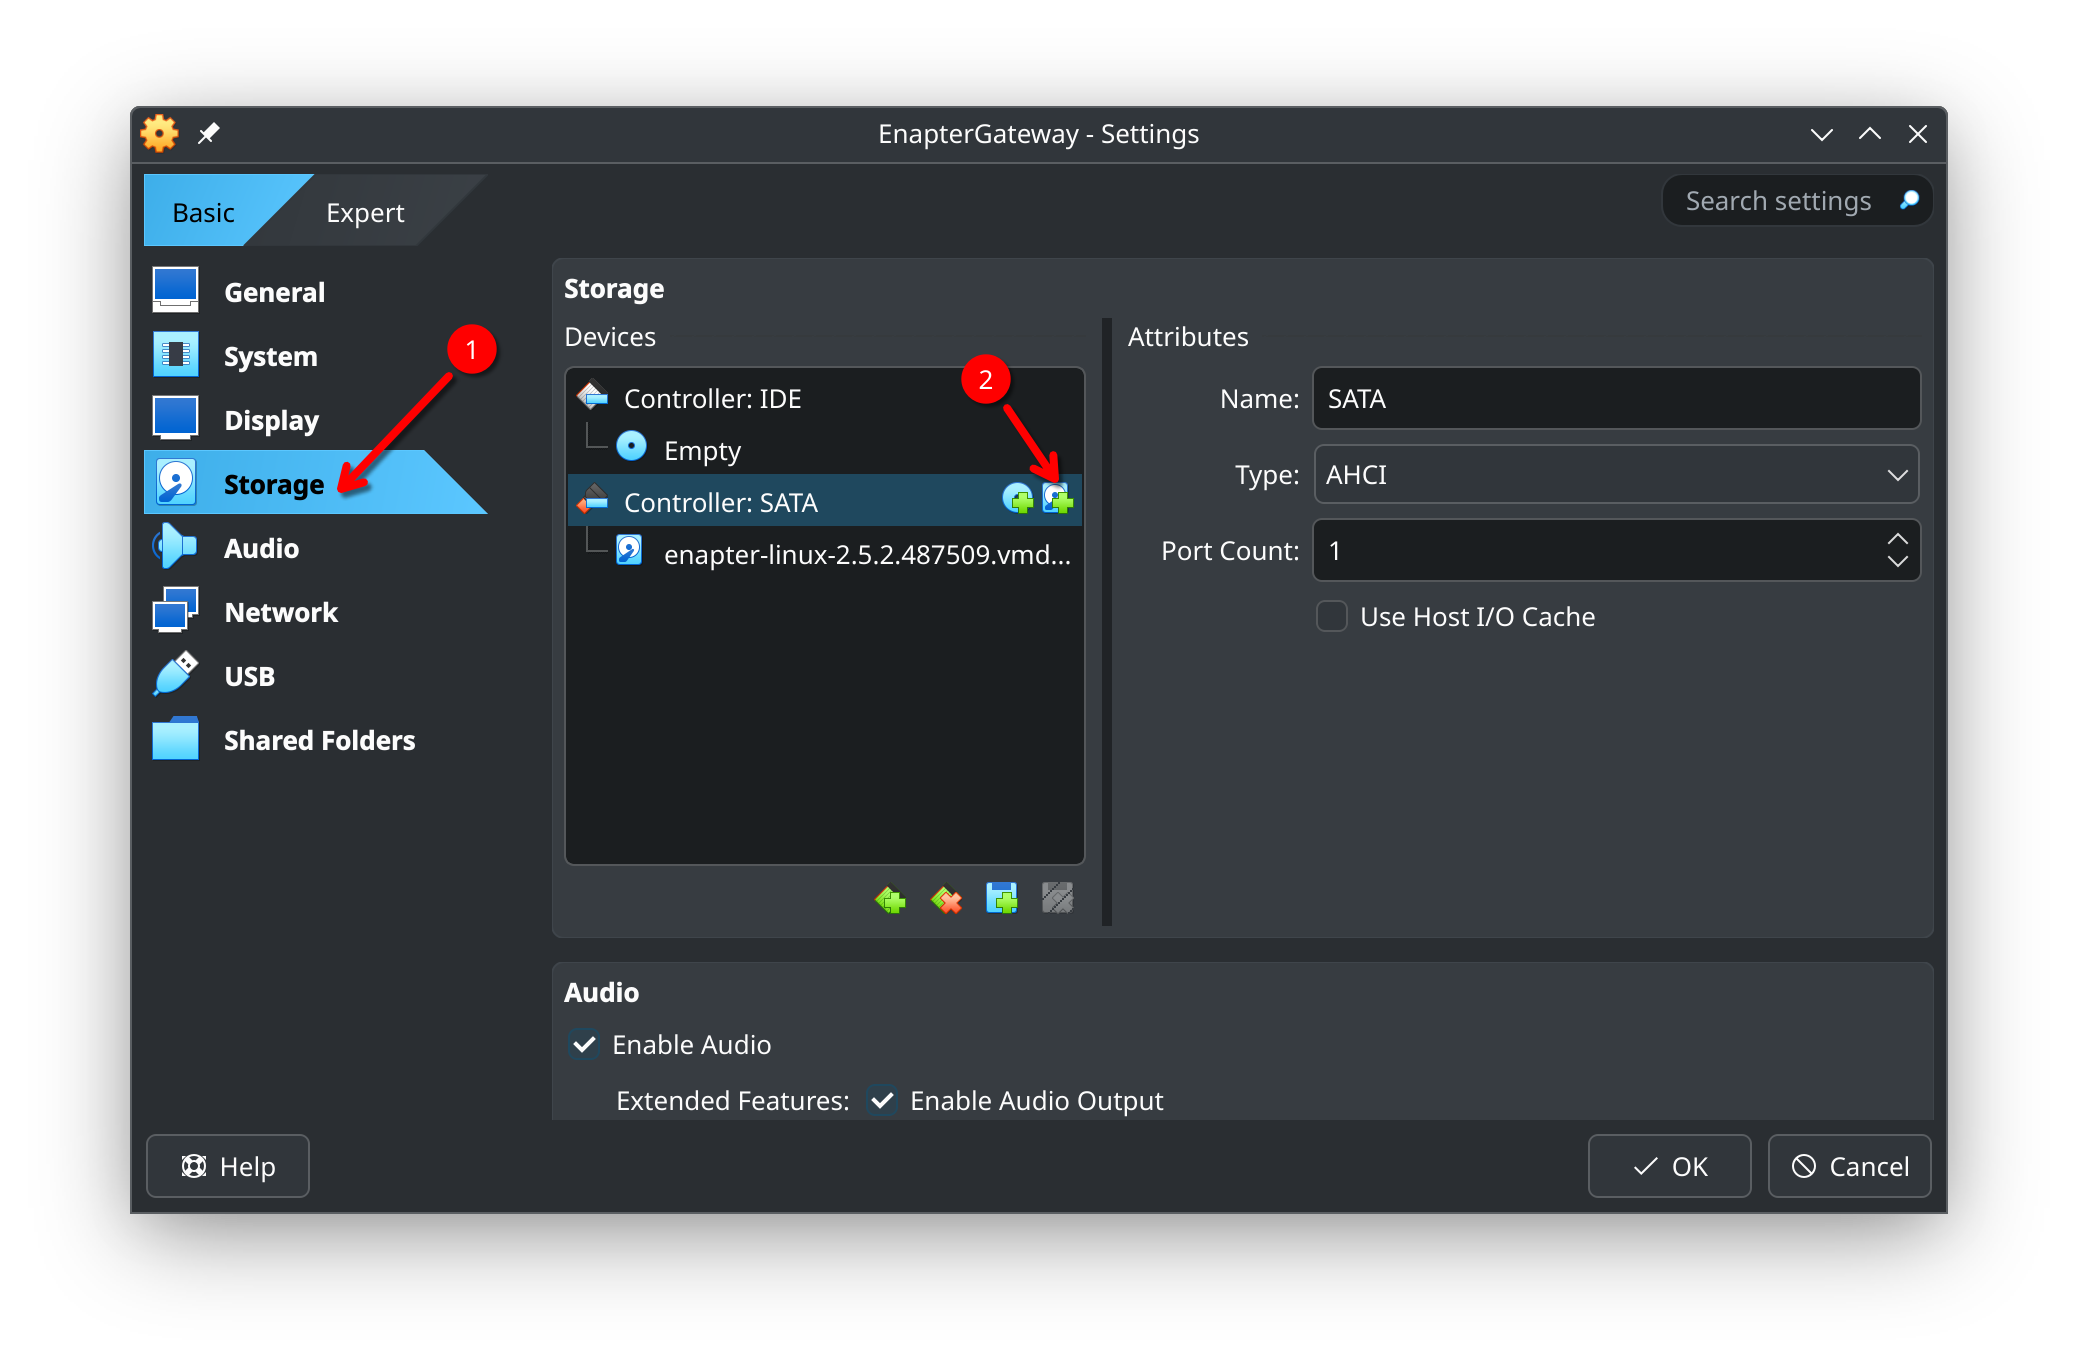
# Step 10: Configure Storage Settings
- In the Settings dialog, select "Storage" from the sidebar
- You will see the existing "Controller: SATA" with the Enapter VMDK disk
- Click the "+" icon next to the SATA controller to add a new disk
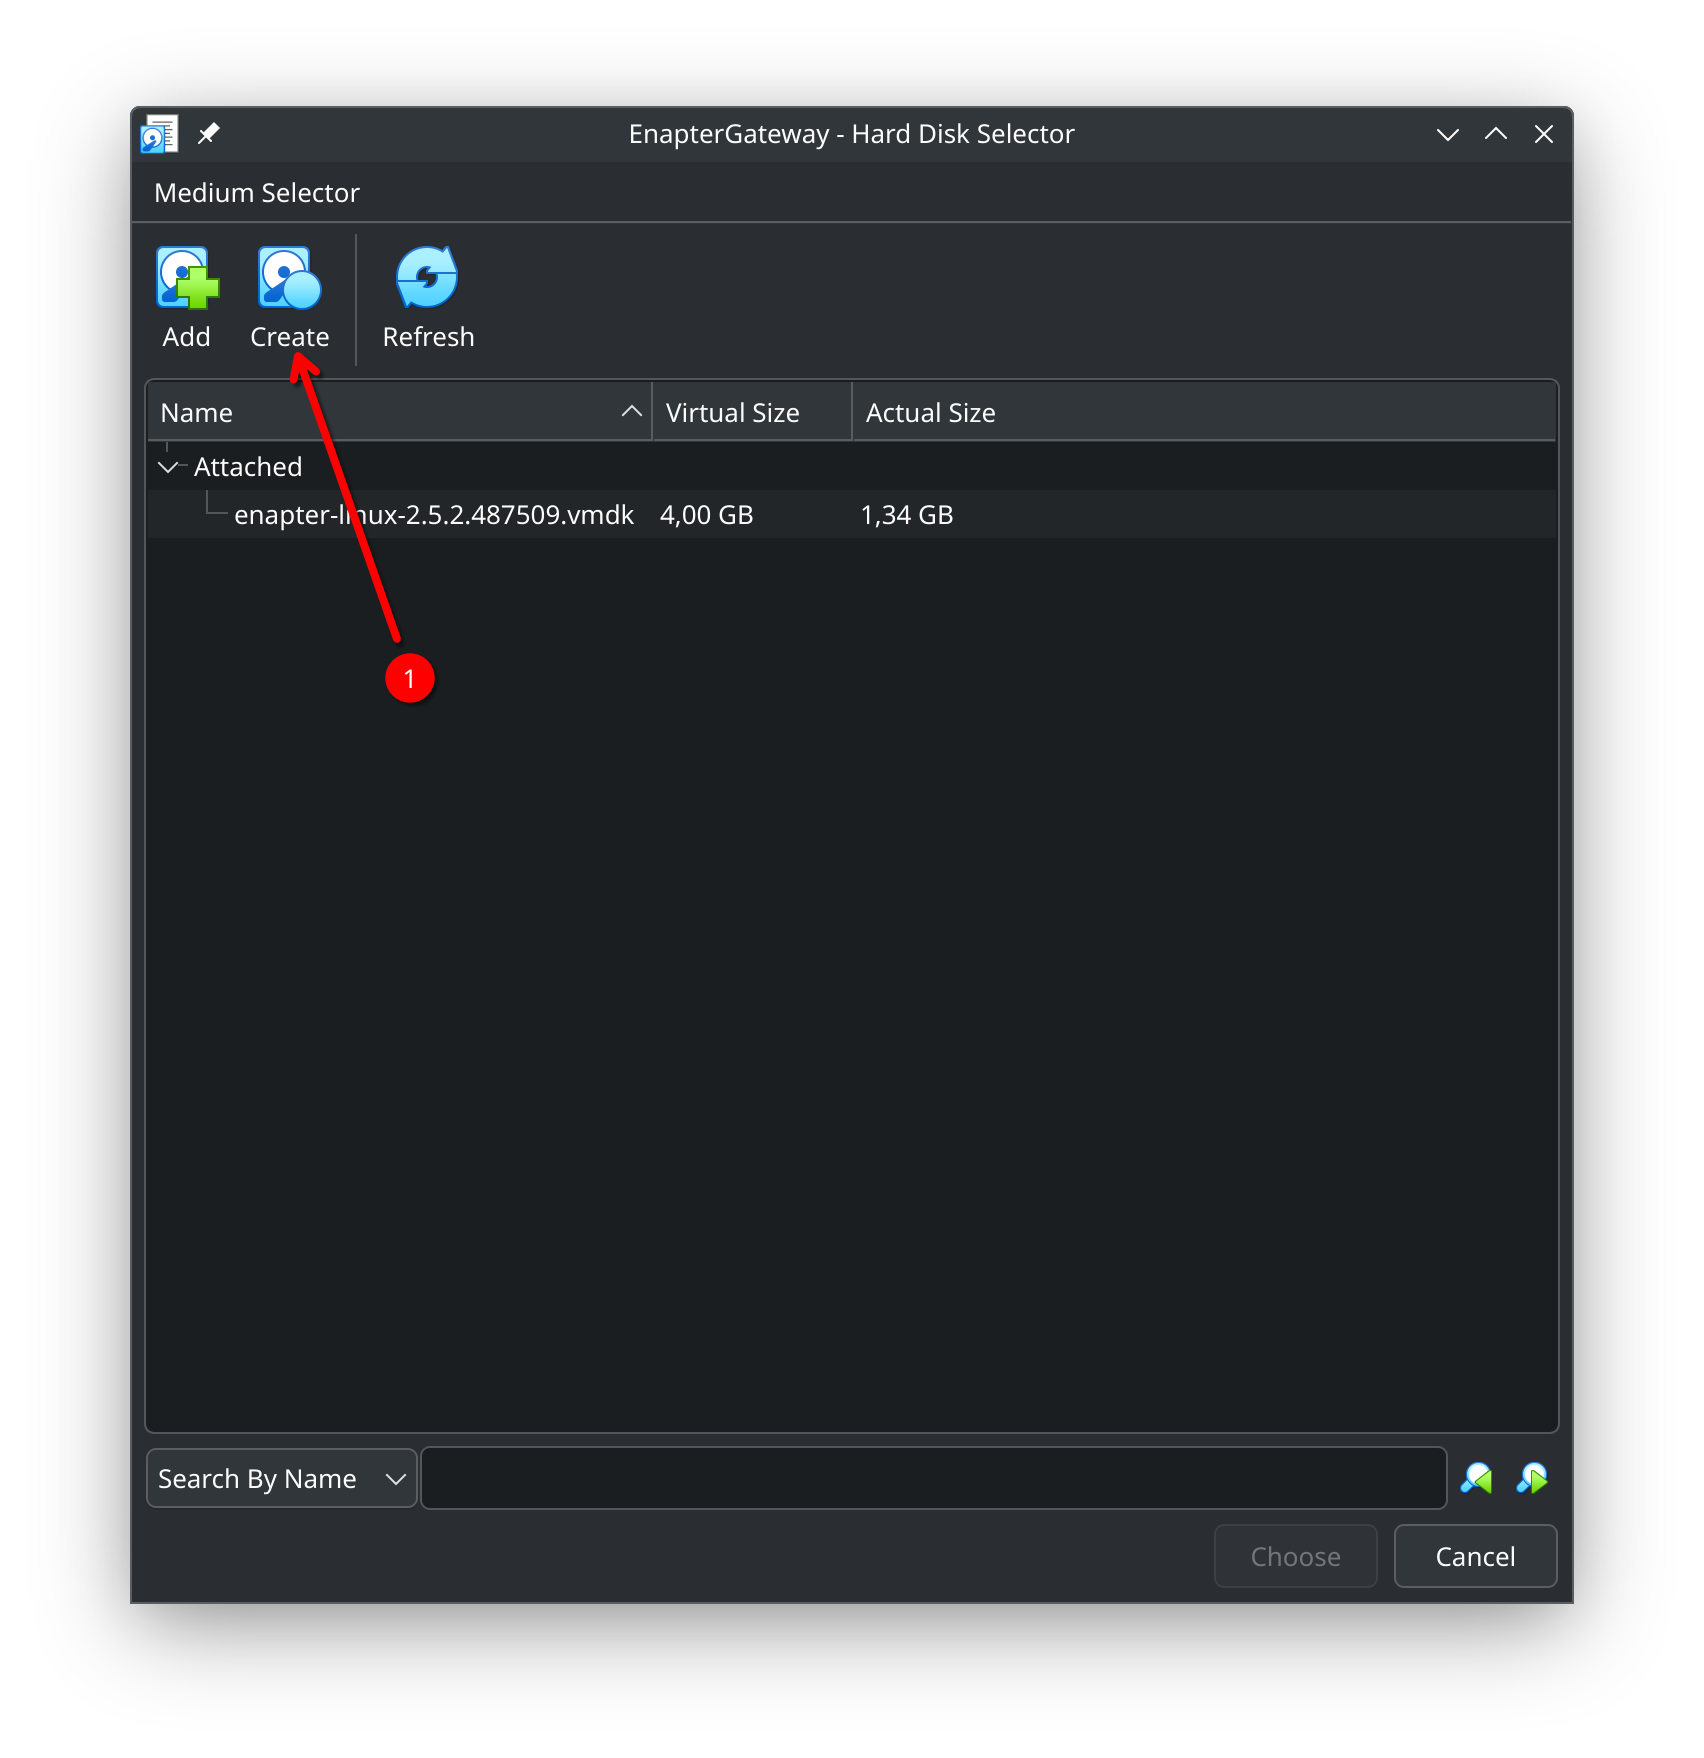
# Step 11: Create Additional Hard Disk
- In the Hard Disk Selector dialog, click "Create" to make a new virtual disk for user data
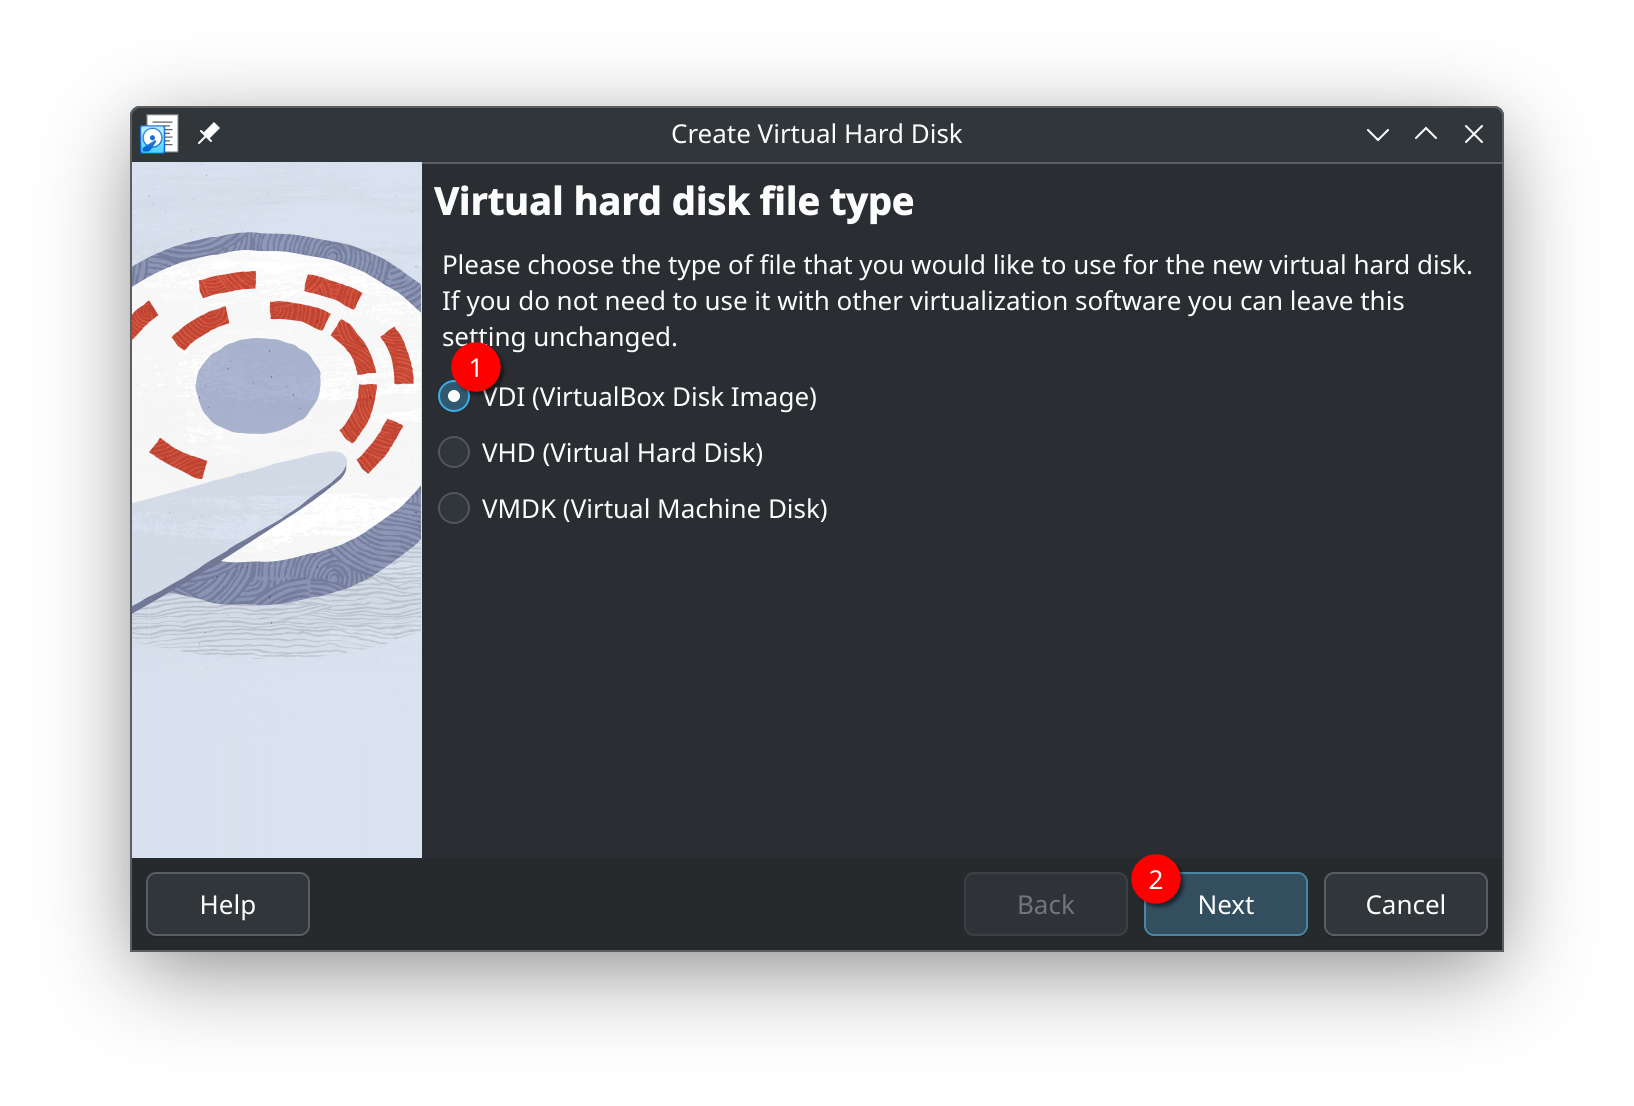
# Step 12: Select Virtual Disk File Type
- Choose "VDI (VirtualBox Disk Image)" as the file type
- Click "Next"
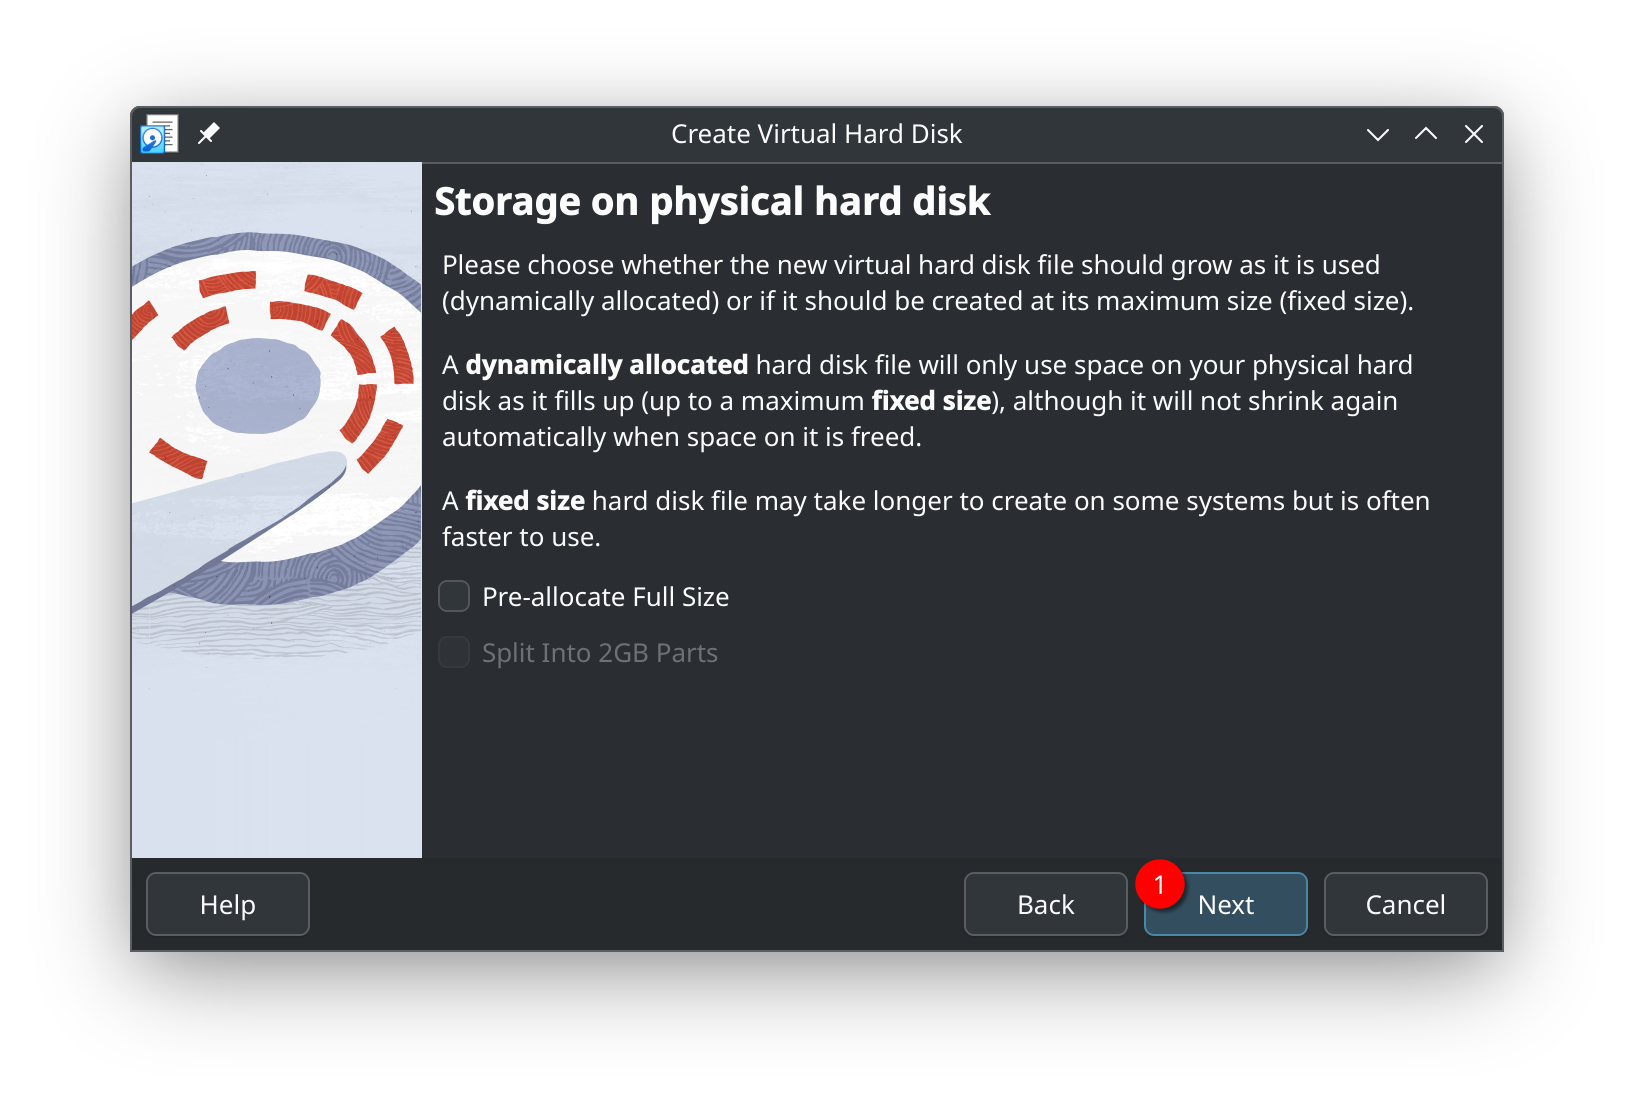
# Step 13: Configure Storage Allocation Type
- Choose between dynamically allocated (grows as needed) or fixed size
- The default (dynamically allocated) is recommended
- Click "Next"
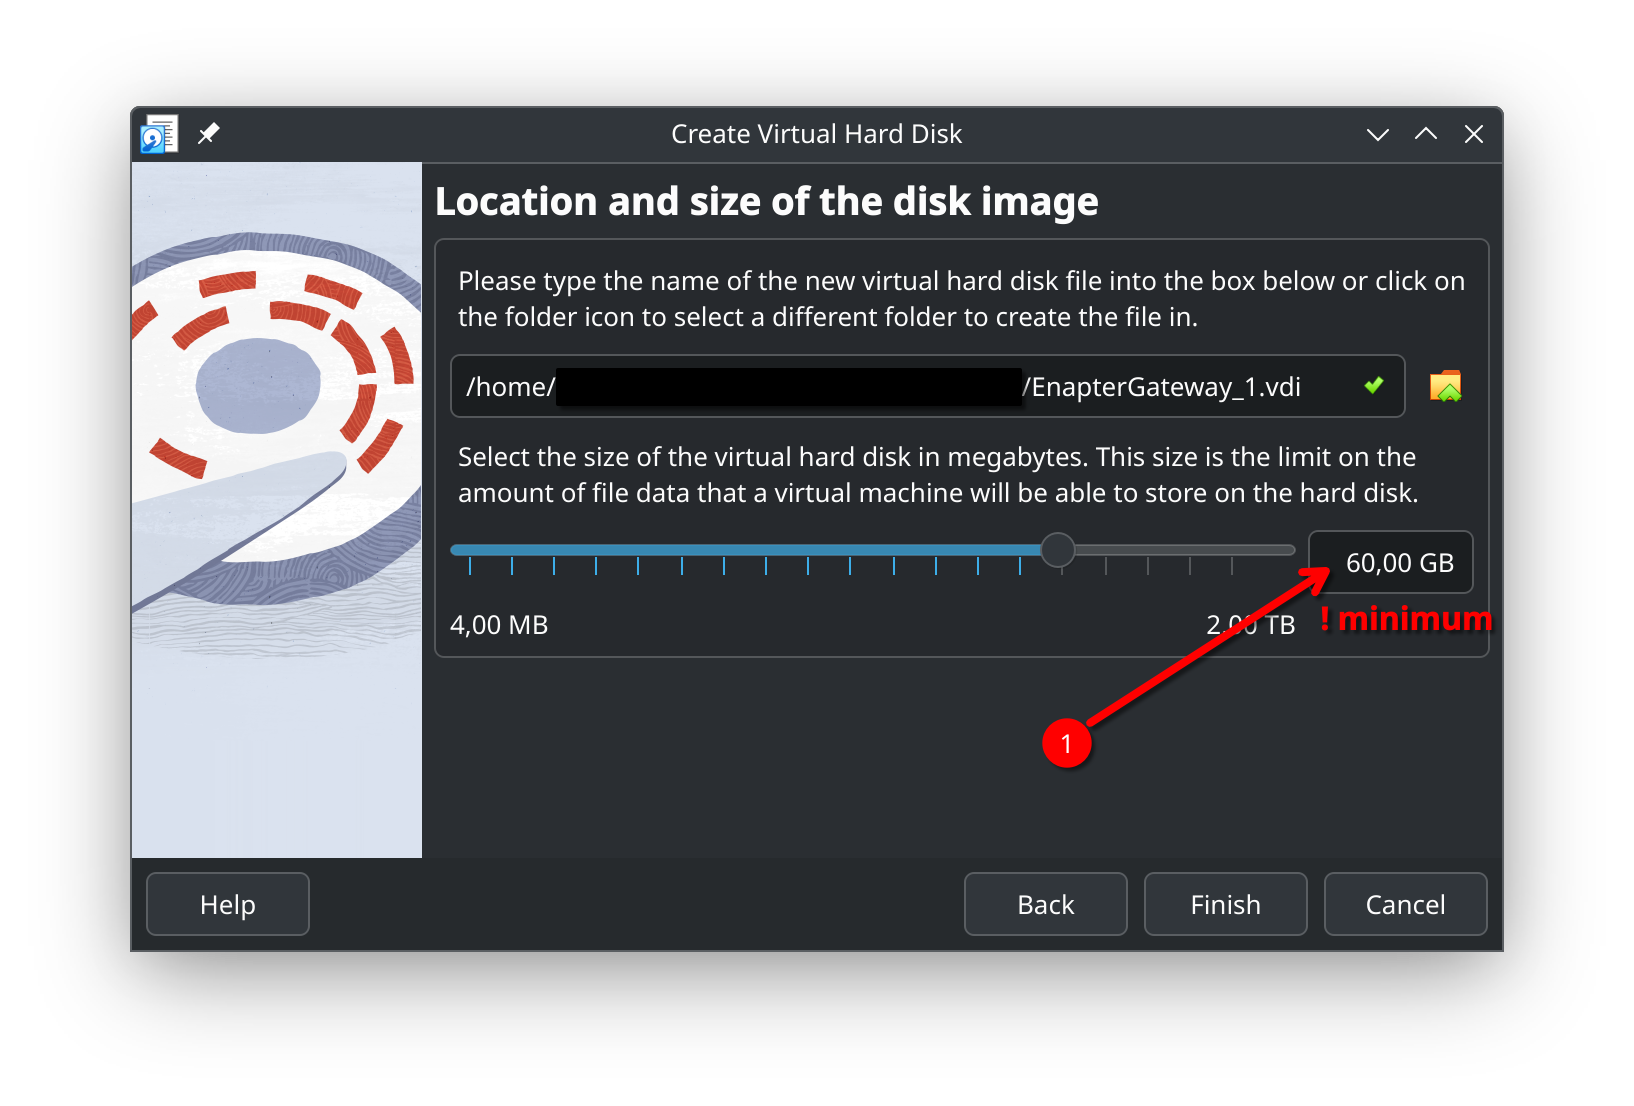
# Step 14: Set Data Disk Size and Location
- Name the disk file (or you can keep auto generated name)
- CRITICAL: Set the disk size to at least 60 GB minimum
- Drag the slider or enter the value directly
- Click "Finish"
# Step 15: Confirm the New Disk
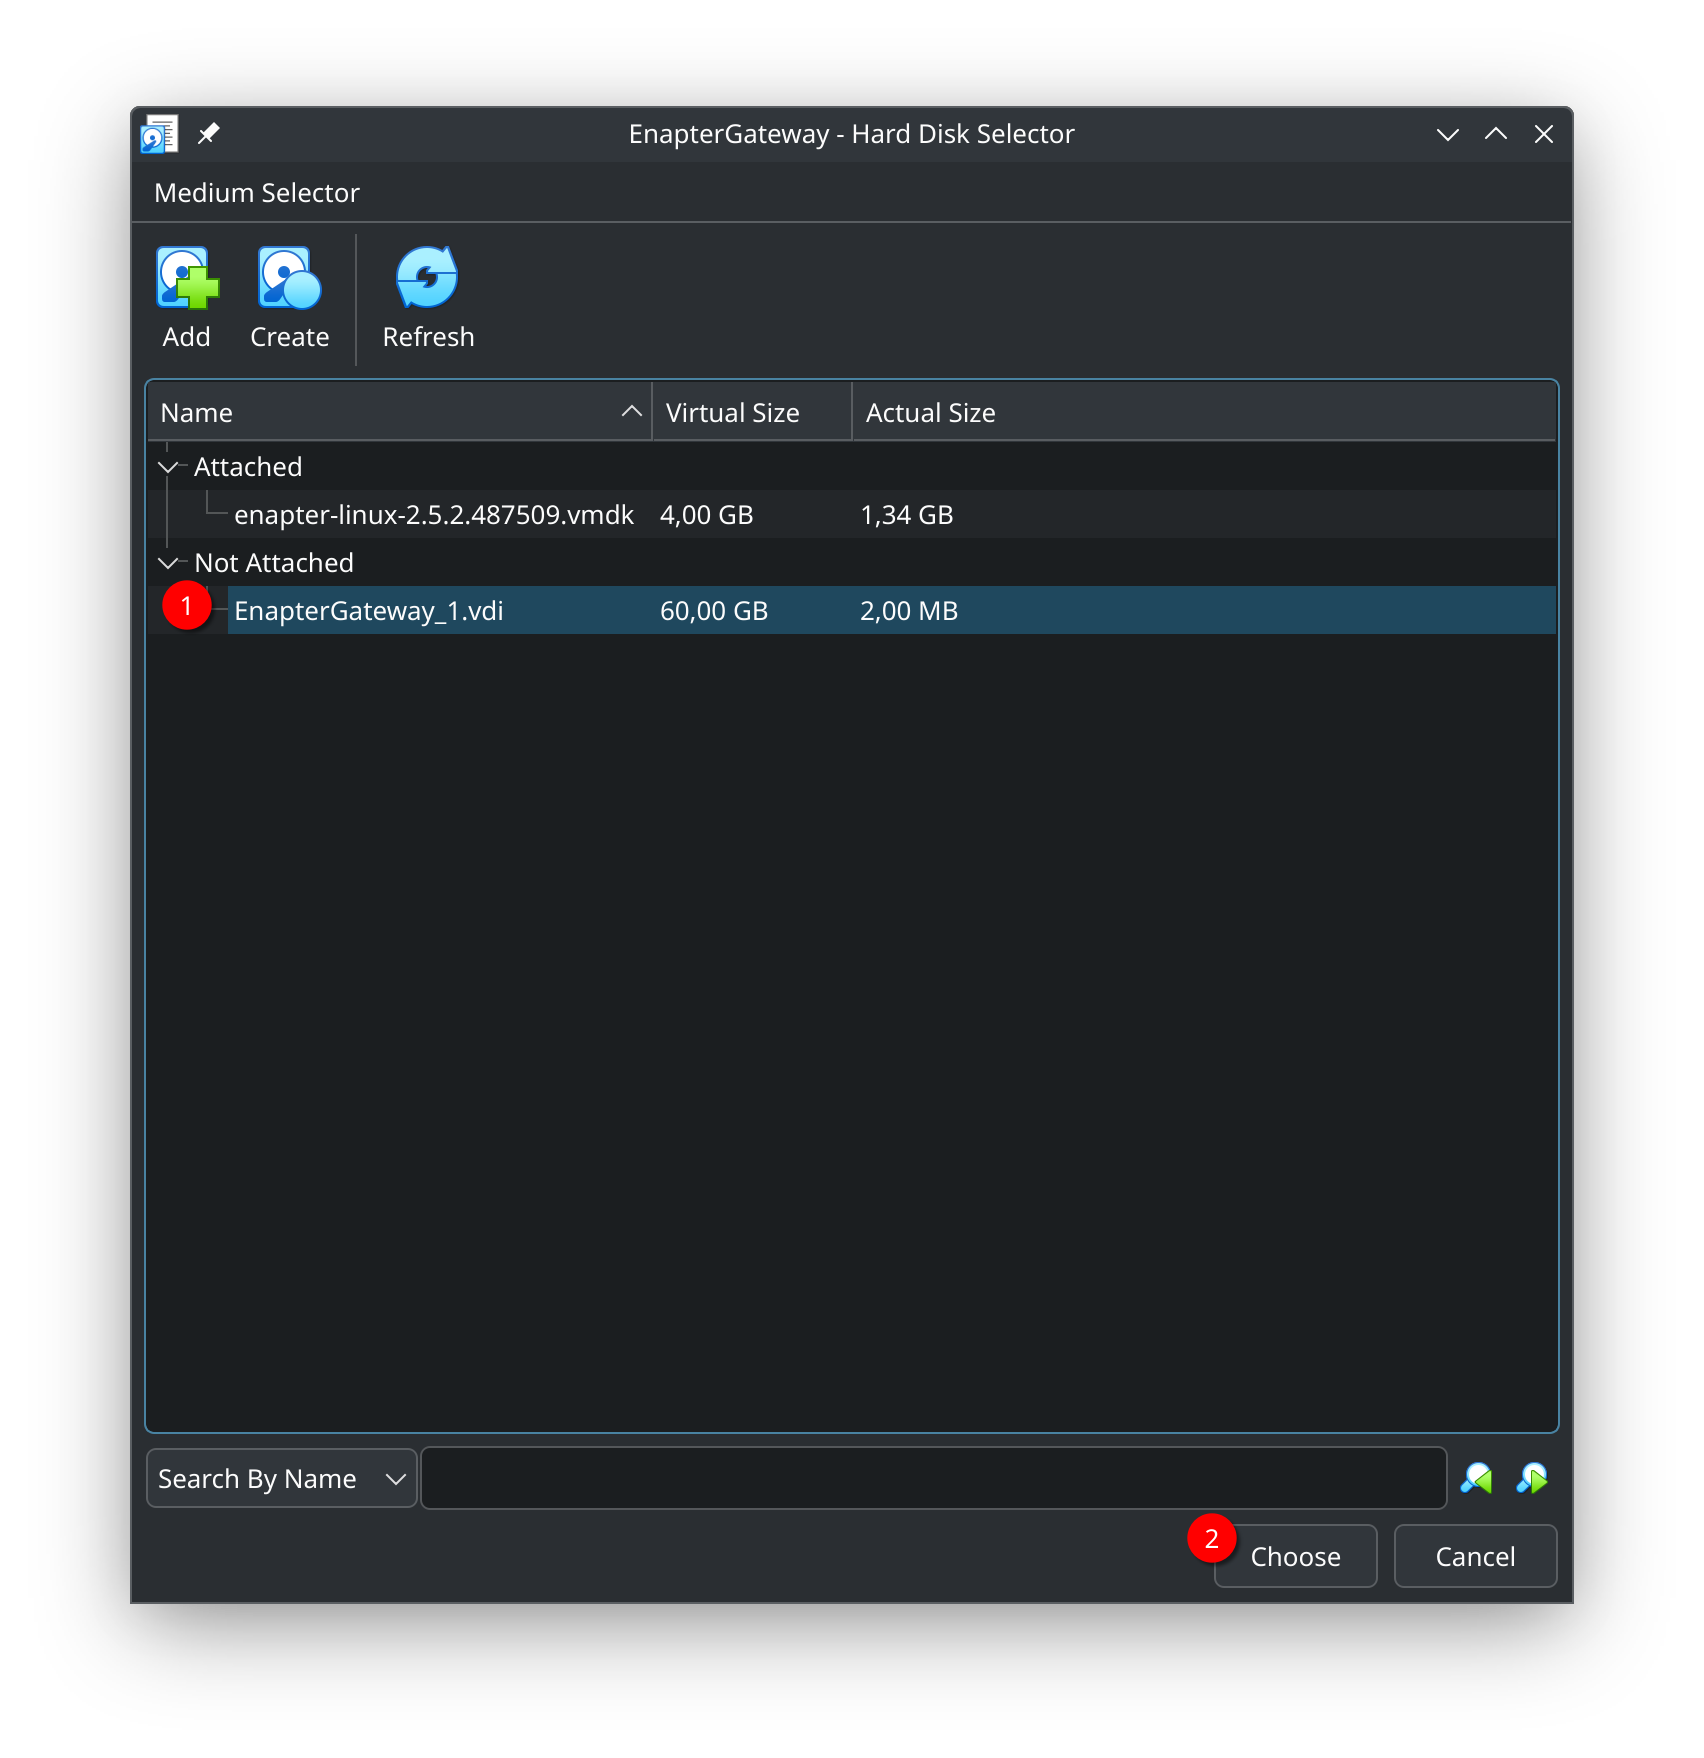
- You should now see both disks in the Hard Disk Selector:
- The original Enapter VMDK (4 GB)
- The new data disk (60 GB)
- The new disk will be selected automatically
- Click "Choose" to add it to your VM
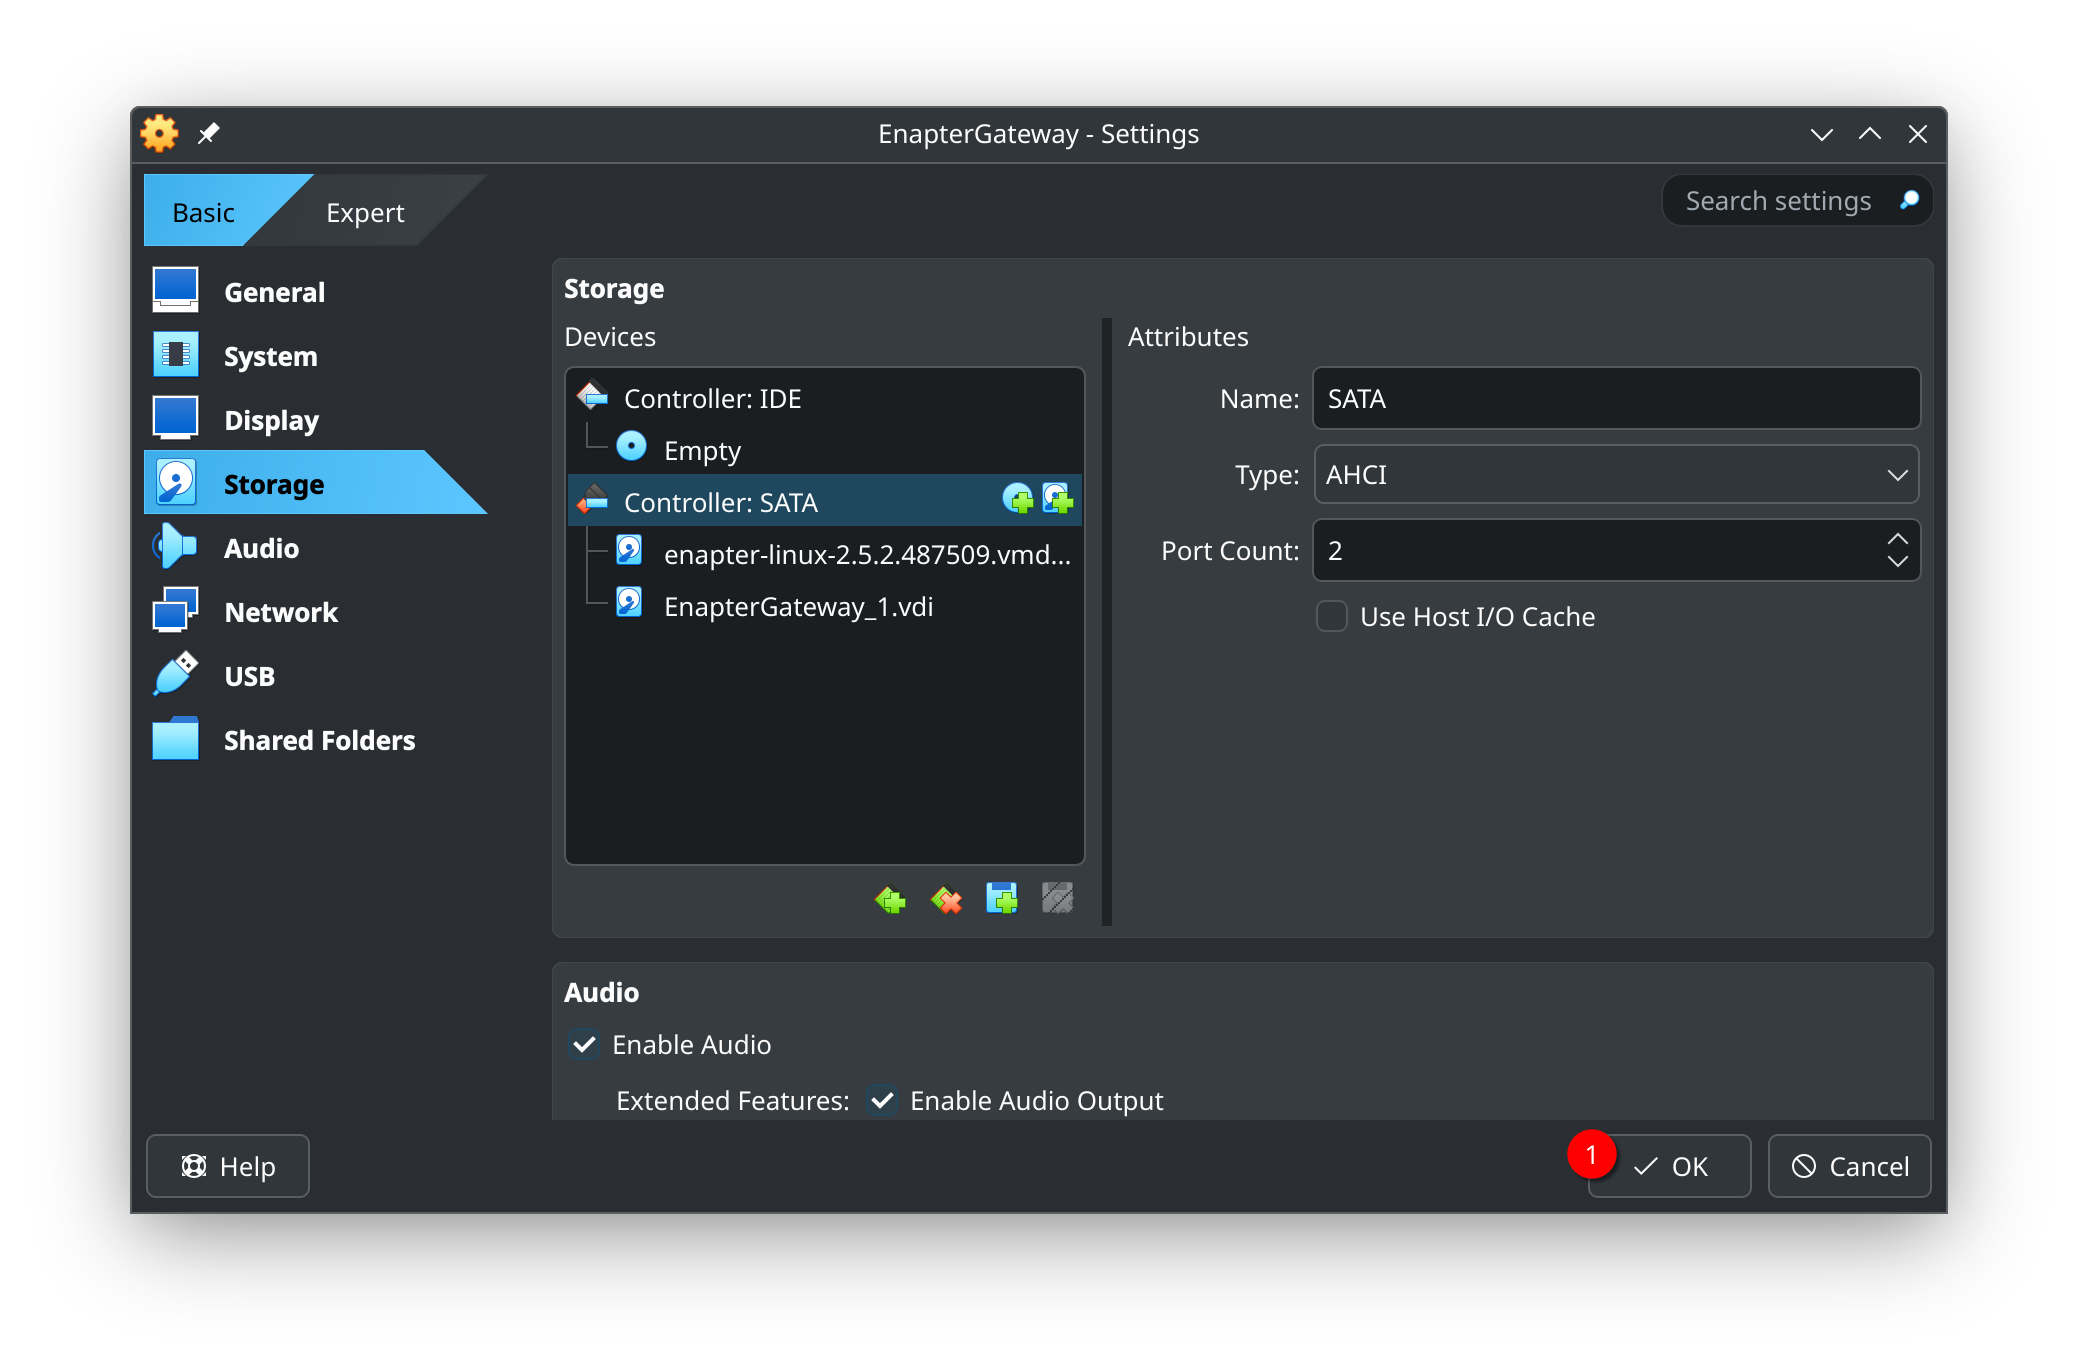
# Step 16: Finalize Storage Configuration
- Verify both disks appear under "Controller: SATA" section
- Click "OK" to save the settings
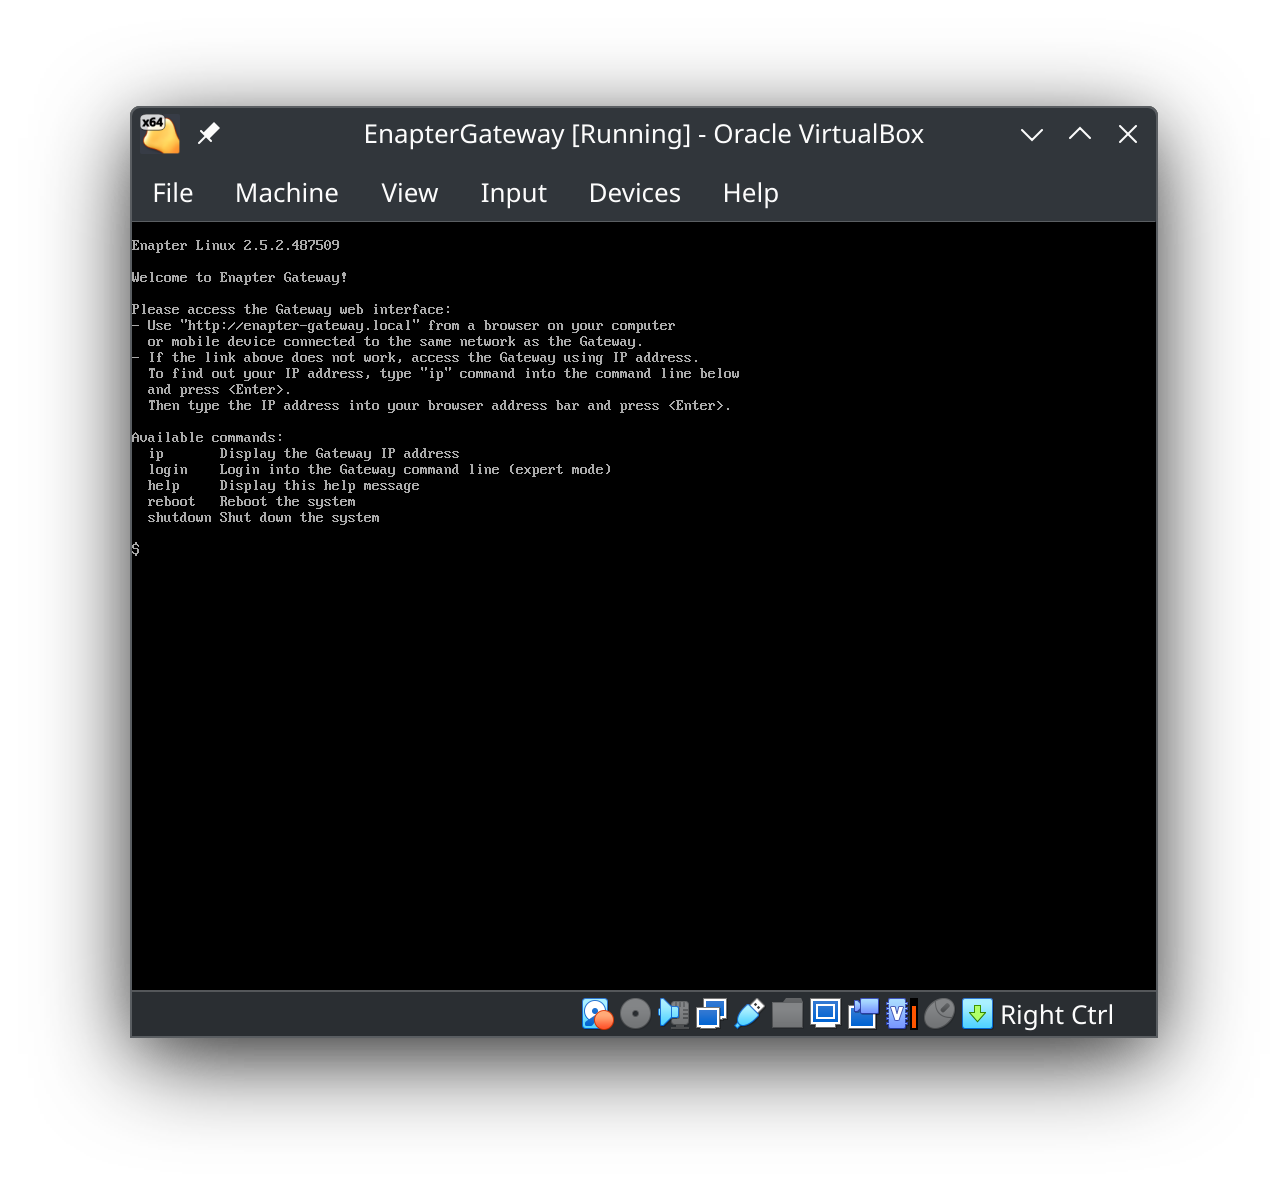
# Step 17: Start and Run the Enapter Gateway
- Back in the VirtualBox Manager, select your VM and click "Start"
- The VM will boot into the Enapter Gateway software
- You will see the welcome screen with instructions for accessing the Gateway
# Important Notes
- The minimum hardware requirements are: 4GB RAM, 60GB storage space for the data disk
- EFI/UEFI boot must be enabled for the system to work properly
- No ISO image is needed as the VMDK file already contains the operating system
- The Gateway is accessed through a web interface from your browser
# 💬 Need Help?
Have a question or hit a roadblock? Join the Enapter Discord community (opens in a new tab) to get quick support, exchange ideas, and collaborate with other developers and energy experts.
Was this page useful?
