# Electrolyser 2.1 (EL 2.1)
Warning
The Electrolyser 2.1 (EL 2.1) is no longer available for purchase.
Electrolysers 4.1 is the latest available model.
Note
Find all details about service and support management for EL 2.1 units in this document.
Enapter’s patented anion exchange membrane (AEM) electrolyser is a standardized, stackable and flexible system to produce on-site hydrogen. The modular design – paired with advanced software integration – allows set up in minutes and remote control and management. Stack this electrolyser to achieve the required hydrogen flowrate.
# Resources
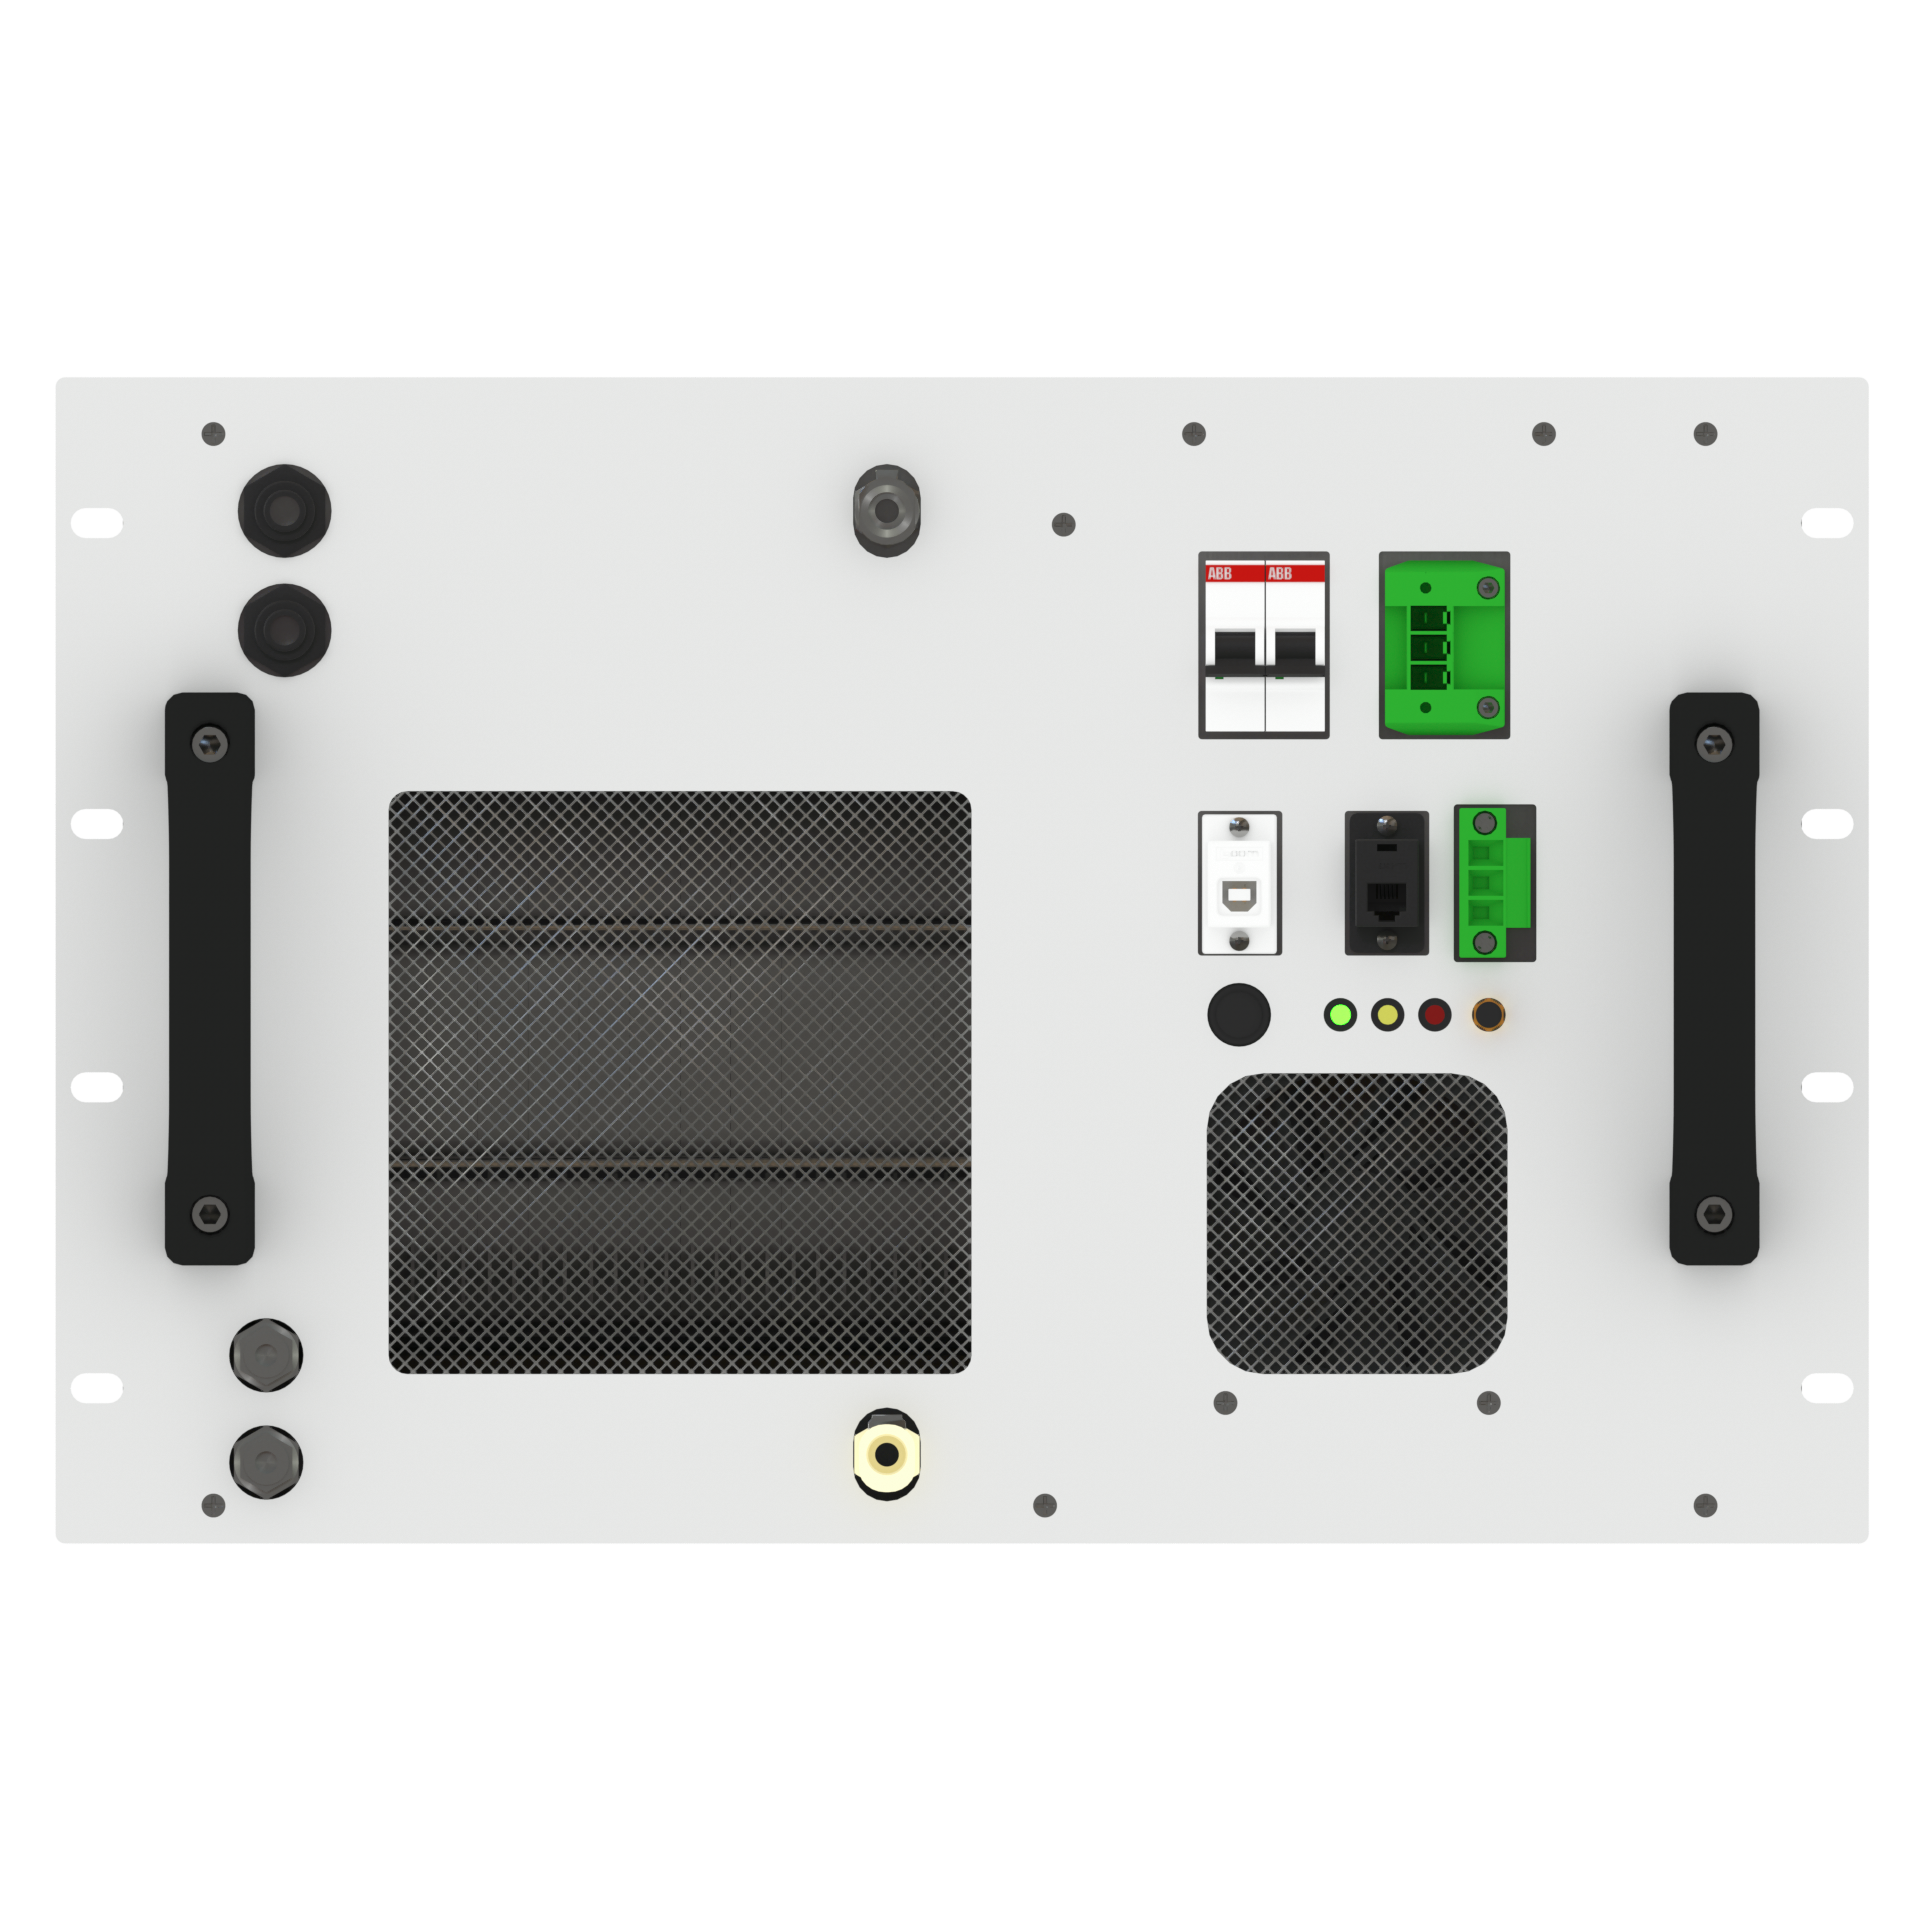
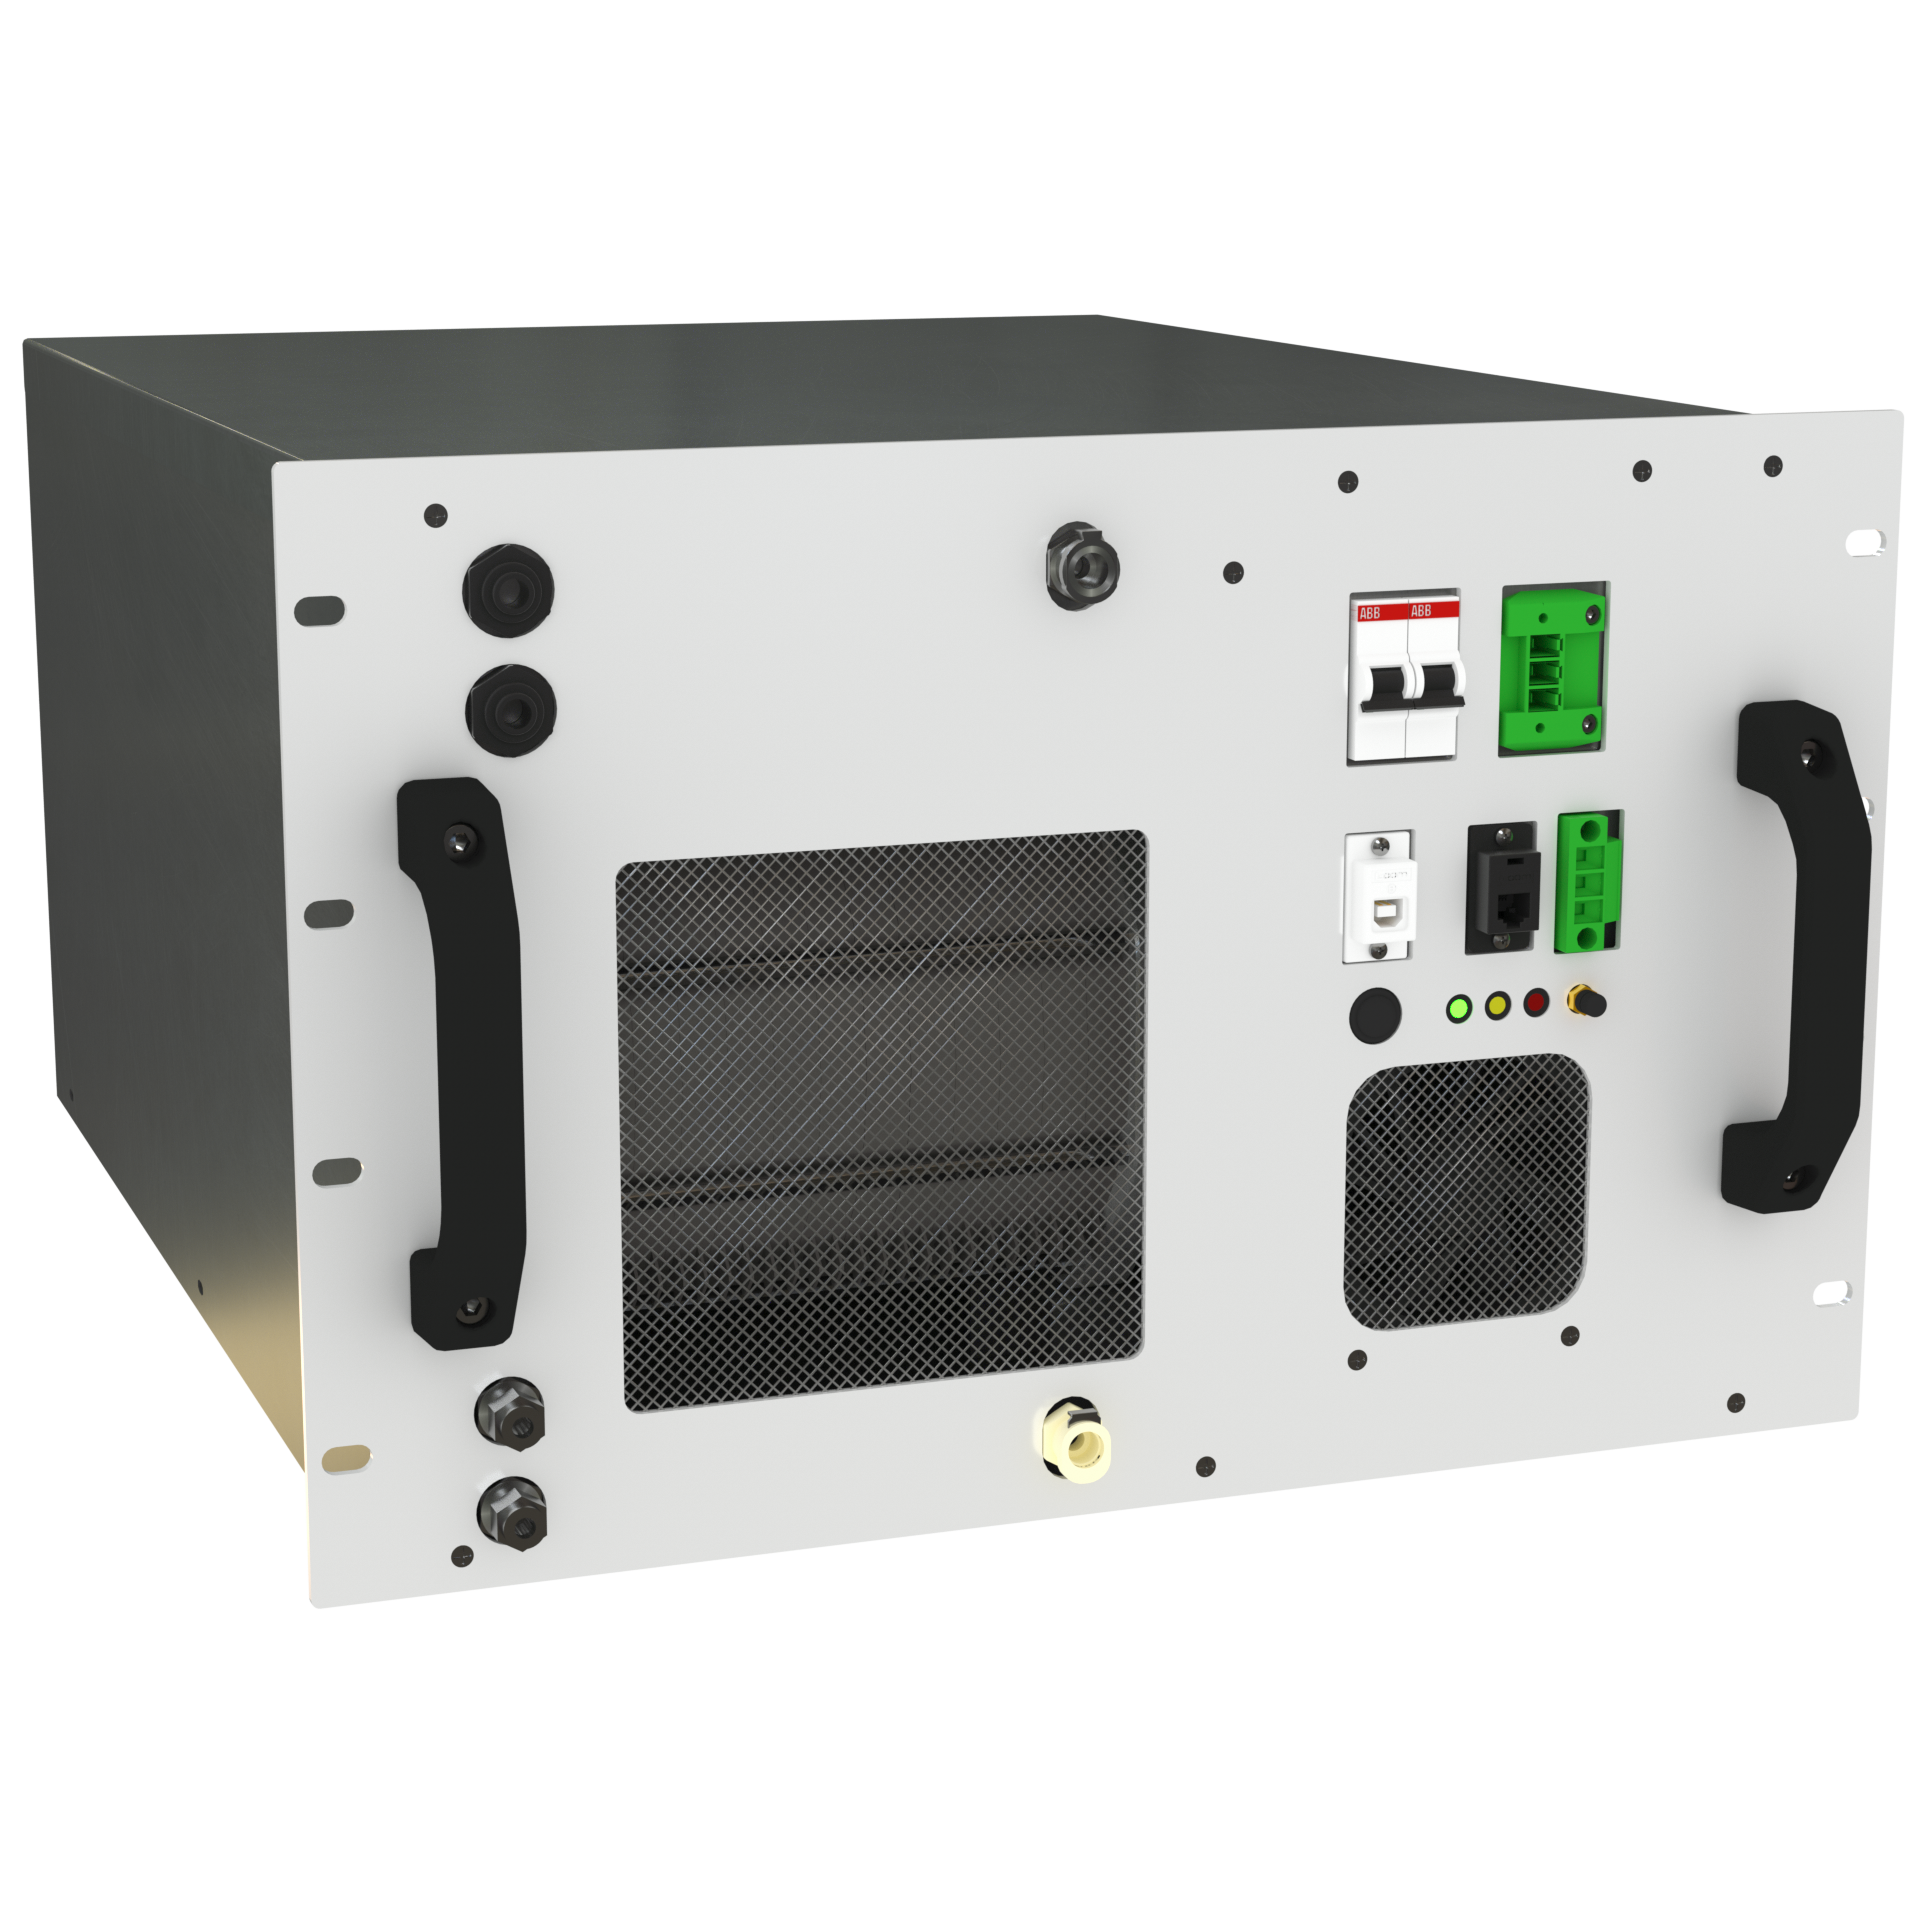
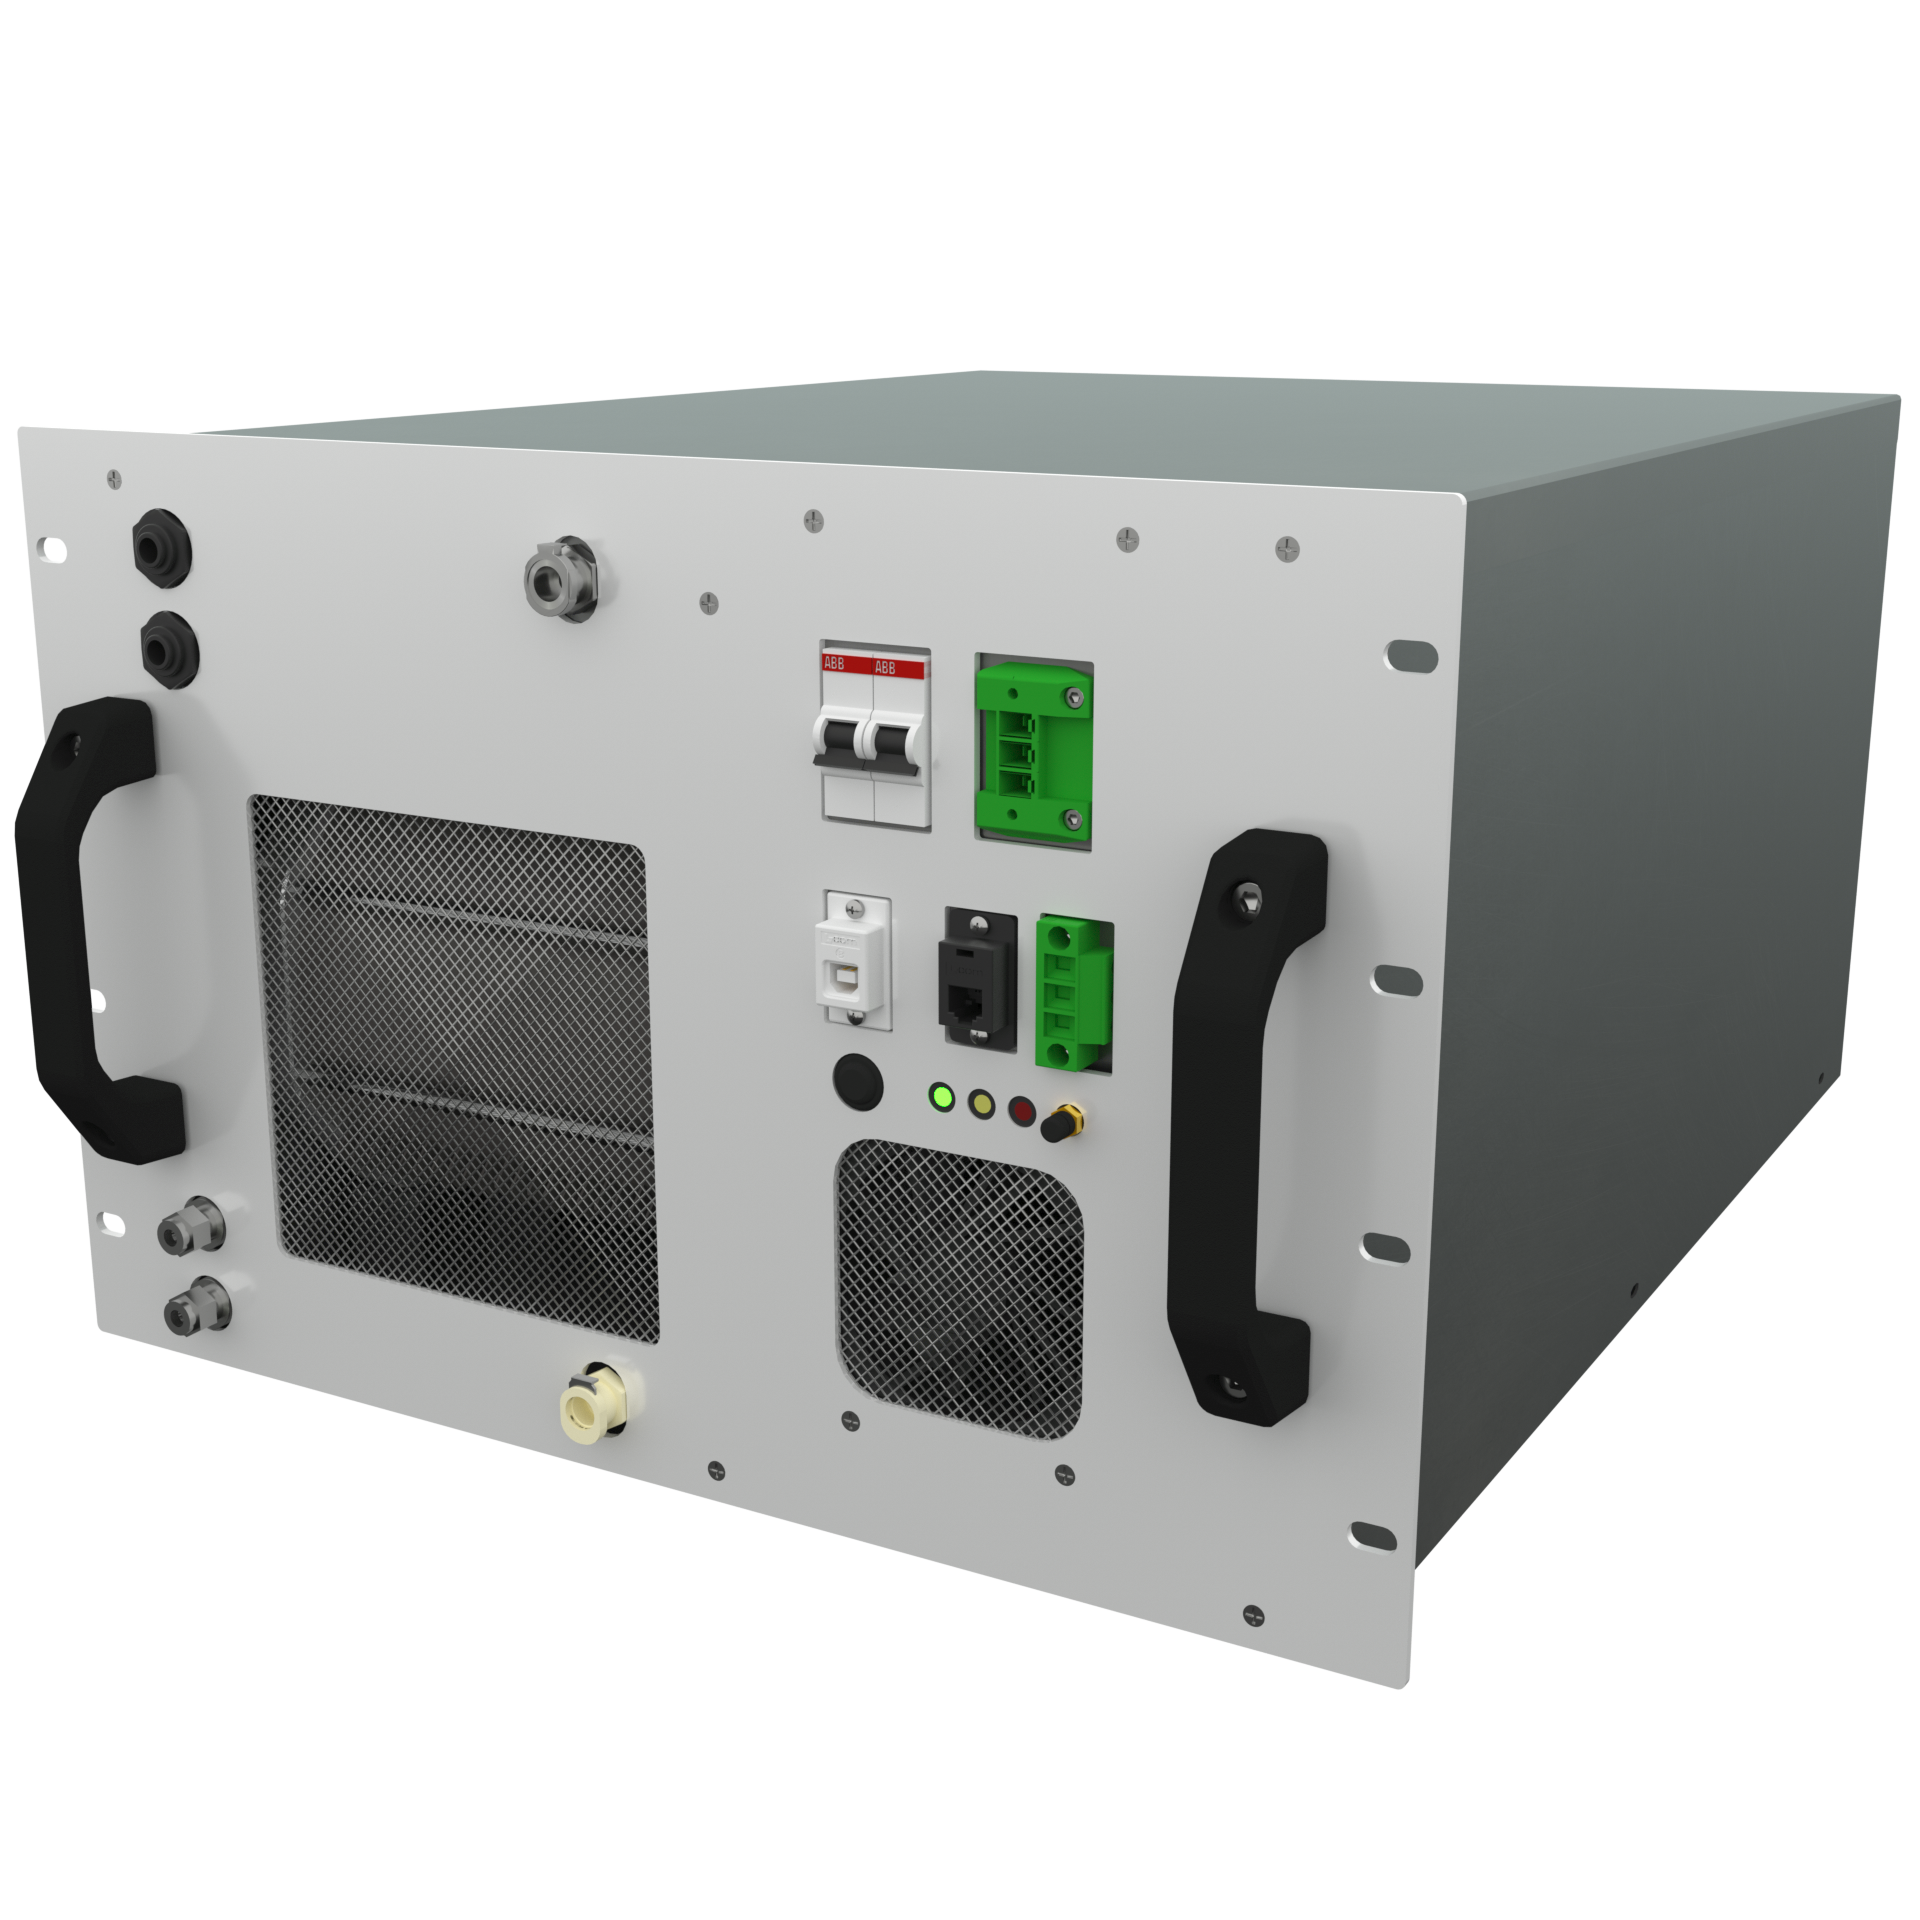
# Images
These images are for illustration purposes only.
# Status LEDs Indications
| Action | Description | LED |
|---|---|---|
| Power on | The device will turn on as soon as the required input voltage is supplied to the EL2.1 and perform a startup self-check. | Red, yellow & green blink thrice |
| Stand-by (Idle state) | The device is idle, waiting for the start of production. | Red, yellow & green are off |
| Stand-by (Max pressure state) | The device reached maximum pressure (normally 35 bar) and will resume hydrogen production automatically when the restart output pressure setpoint is reached. | Green blinking |
| Steady | The device in steady state. | Green steady |
| Button press | When the start-stop button is pressed. | Red, yellow & green blink once |
| Factory Settings Reset | Simultaneously pressing the start-stop button and power up the device will activate Factory Settings Reset. | Running fire (each LED blinks after another) |
| Maintenance mode | The device is in maintenance mode. | Yellow steady |
| Locate device | When locate device is enabled via remote control. | Red, yellow & green blinking |
| Warning | Heads-up event which should be taken into account to avoid Error or Fatal Error. | Yellow Blinks |
| Error | System stopped. Recoverable error. | Red Blinks |
| Fatal Error | System stopped. Unrecoverable error. Hardware repair required. Please contact Enapter support. | Red and Yellow Blinks |
| Panic | System stopped. Unrecoverable error. Please contact Enapter support. | Red steady with green steady (hardware problem) or yellow steady (software problem) |
# Blowdown Routine
This automatic routine will appear if the electrolyser has not been in STEADY or RAMP UP mode for a certain period of time; in other words, if the electrolyser has not been in use for some time. The relief valve on the outlet of the electrolyser which is a mechanical spring valve, not being in use it might not work properly when the 29 bar is reached and might need extra pressure to open the first time.
There will be a warning that notifies when the routine starts: WARNING “WO_20”.
The Blowdown Routine does not interfere with the normal ramp up routine, but only makes some changes to the safety routine checks.
The Blowdown Routine can be enabled using Enapter Cloud.
# Factory Settings Reset
Factory Settings Reset presented in EL 2.1 firmware v1.3.0 allows to reset device to factory settings.
To enable Factory Settings Reset user should simultaneously press the Start/Stop button and power up the device, then button should be pressed until LEDs blink running fire (each LED blinks after another) and released in 5 seconds. Electrolyser sends command to UCM to perform Factory Settings Reset. Electrolyser and UCM will be reset to Factory Default Settings.
There will be a warning if the Start/Stop button have not been released in 5 seconds: WARNING “WP_04”.
Electrolyser can be reset using Cloud command Factory Reset or Modbus Holding Register #9 - in this case only Electrolyser settings are reset to Factory Default Settings while UCM settings are saved.
After the Factory Settings Reset the electrolyser will move to Maintenance Mode if water level is low than low level. If water level is more than low level the electrolyser will remain in Operation Mode.
# Remote Monitoring and Control
# Introduction
# Network Requirements
Network open port requirements:
| Port | Protocol | Destination Host (IP-Address / Range or Name) |
|---|---|---|
| 80 | TCP | 193.9.249.0/24 (api.enapter.com) |
| 443 | TCP | 193.9.249.0/24 (api.enapter.com) |
| 123 | UDP | 193.9.249.0/24 (ntp.enapter.com) |
| 514 | TCP and UDP | log.enapter.ninja |
| 3478 | TCP and UDP | 193.9.249.0/24 |
| 8301 | UDP | 193.9.249.0/24 |
| 8302 | UDP | 193.9.249.0/24 |
| 8883 | TCP | 193.9.249.0/24 (mqtt.enapter.com) |
| 1883 | TCP | 193.9.249.0/24 (mqtt.enapter.com) |
| 19302 | UDP | stun.l.google.com |
Note
Firewall must be stateful.
WI-Fi requirements:
802.11/g/n (2.4 GHz only)
802.12 WEP, WPA, WPA2 Personal (Pre-shared key)
Note
No captive portal or WPA2 Enterprise supported.
# Connecting your Electrolyser to Wi-Fi
To connect the EL 2.1 electrolyser to wireless networks, follow the steps in the iOS or Android Mobile Application guides below. Please note, the QR-code or preinstalled UCM’s ID and PIN are required when connecting to Wi-Fi as well as credentials for the 2,4 GHz Wi-Fi network.
Enapter iOS Mobile Application Guide
Enapter Android Mobile Application Guide
During connection to Wi-Fi network the QR-code or preinstalled UCM’s ID and PIN needed. The location for both of them is shown on pictures below.
Front view:

Rear view:

# Safety Heartbeat
This functionality increases safety in cases of loss of control by Enapter Gateway or any 3rd party Modbus master device.
Safety Heartbeat presented in EL 2.1 firmware v1.2.0 is a periodic signal generated by Enapter Gateway or any Modbus master device (i.e PLC) to indicate continuous connection with the Electrolyser.
If the Electrolyser does not receive the heartbeat in a time (heartbeat period) — the machine will normally shut down. Lose of the signal may happen when Gateway or PLC is powered off, when there is connection issue.
# EL 2.1 Heartbeat
To activate Heartbeat on the EL 2.1 you need to change Heartbeat parameters. To do it use Modbus Holding Register #4600 (for Modbus master) or #4602 (for Enapter Gateway).
Parameters:
Heartbeat_gatewaytimeout_s - timeout for Gateway Heartbeat in seconds. Default value = 0 (disabled).
Heartbeat_modbustimeout_s - timeout for Modbus Heartbeat in seconds. Default value = 0 (disabled).
# Gateway Heartbeat
How to activate Safety Heartbeat on the Gateway:
Connect to the Gateway - please check this page (opens new window).
Configure Safety Heartbeat on the Gateway - please check this page (opens new window).
# Modbus Heartbeat
How to activate Safety Heartbeat using Modbus protocol - please check the example of Writing Heartbeat Modbus Timeout (opens new window).
# Cloud over Ethernet Beta
Warning
Cloud over Ethernet is in Beta.
Cloud over Ethernet is a cutting-edge feature for Enapter Web GUI (opens new window) that empowers Enapter electrolyser users to seamlessly connect their devices to cloud services using an Ethernet interface. This advanced connectivity solution opens up a realm of possibilities for remote monitoring, data logging, and control of the electrolyser through a secure and efficient cloud platform.
For more information please check the Cloud over Ethernet Documentation (opens new window).
# Known Hardware Bugs
Electrostatic discharge into the Wi-Fi antenna, may cause crash Ethernet and modbus.
Solution: Reboot electrolyser using cloud (find the device in Enapter Cloud (opens new window) and execute Reset command (Commands > Electrolyser > Reset) or do system power restart (turn off it and restore power back).
# Firmware
# Firmware 1.12.3 ✨
# Previous Versions
Show more
# Firmware 1.12.2
# Firmware 1.12.1
# Firmware 1.12.0
# Firmware 1.11.1
# Firmware 1.11.0
# Firmware 1.10.2
# Firmware 1.10.1
# Firmware 1.10.0
# Firmware 1.9.3
# Firmware 1.9.2
# Firmware 1.9.1
# Firmware 1.9.0
# Firmware 1.8.4
# Firmware 1.8.3
# Firmware 1.8.2
# Firmware 1.8.1
# Firmware 1.8.0
# Firmware 1.7.0
# Firmware 1.6.1
# Firmware 1.6.0
# Firmware 1.5.2
# Firmware 1.5.1
# Firmware 1.5.0
# Firmware 1.4.0
# Firmware 1.3.0
# Firmware 1.2.3
# Firmware 1.2.1
# Firmware 1.2.0
# Firmware 1.1.2
# Firmware 1.1.1
# Firmware 1.1.0
# Firmware 1.0.2
# Firmware 1.0.1
# Firmware 1.0.0
Was this page useful?